You drag a photo into the Media Library, WordPress thinks about it for a moment, and then — an error. No explanation, no details, no mercy. Here’s the good news: common causes include a rejected file name or file size, low PHP limits, plugin conflicts, incorrect uploads-folder permissions, and temporary server issues. The six methods below will help you test those possibilities and provide a fallback when the cause remains unclear.
Images are a super duper important part of any website. MIT neuroscientists found that the brain can identify images seen for as little as 13 milliseconds, and pictures can help us understand complex ideas. As a site owner, this means spending a lot of time with photos. And when you’re regularly uploading images to your WordPress website, it’s only natural to stumble upon the occasional error message.
Fortunately, there are ways to diagnose even the fuzziest image upload issue. After running through a checklist of common fixes, you should have no problems adding beautiful, eye-catching visuals to your website.
In this article, we’ll look at why image-related errors can be tricky to diagnose. We’ll then share six solutions for you to try the next time the WordPress Media Library doesn’t want to cooperate with your creative vision. Let’s get started!
An Introduction To WordPress Image Errors (And Why They’re A Problem)
Beautiful visuals aren’t just pretty to look at. If you’re running an e-commerce store, product images are particularly important for driving sales, because they let people see what they’re purchasing. The web reflects that: according to the HTTP Archive’s 2024 Web Almanac, the median desktop page makes 18 image requests — only JavaScript files are requested more often.
However, uploading images to WordPress isn’t always straightforward. Sometimes, this popular Content Management System (CMS) displays a failure to upload error. These issues are notoriously difficult to diagnose, as a number of factors trigger them. This can make it difficult to know where to start to address the problem.
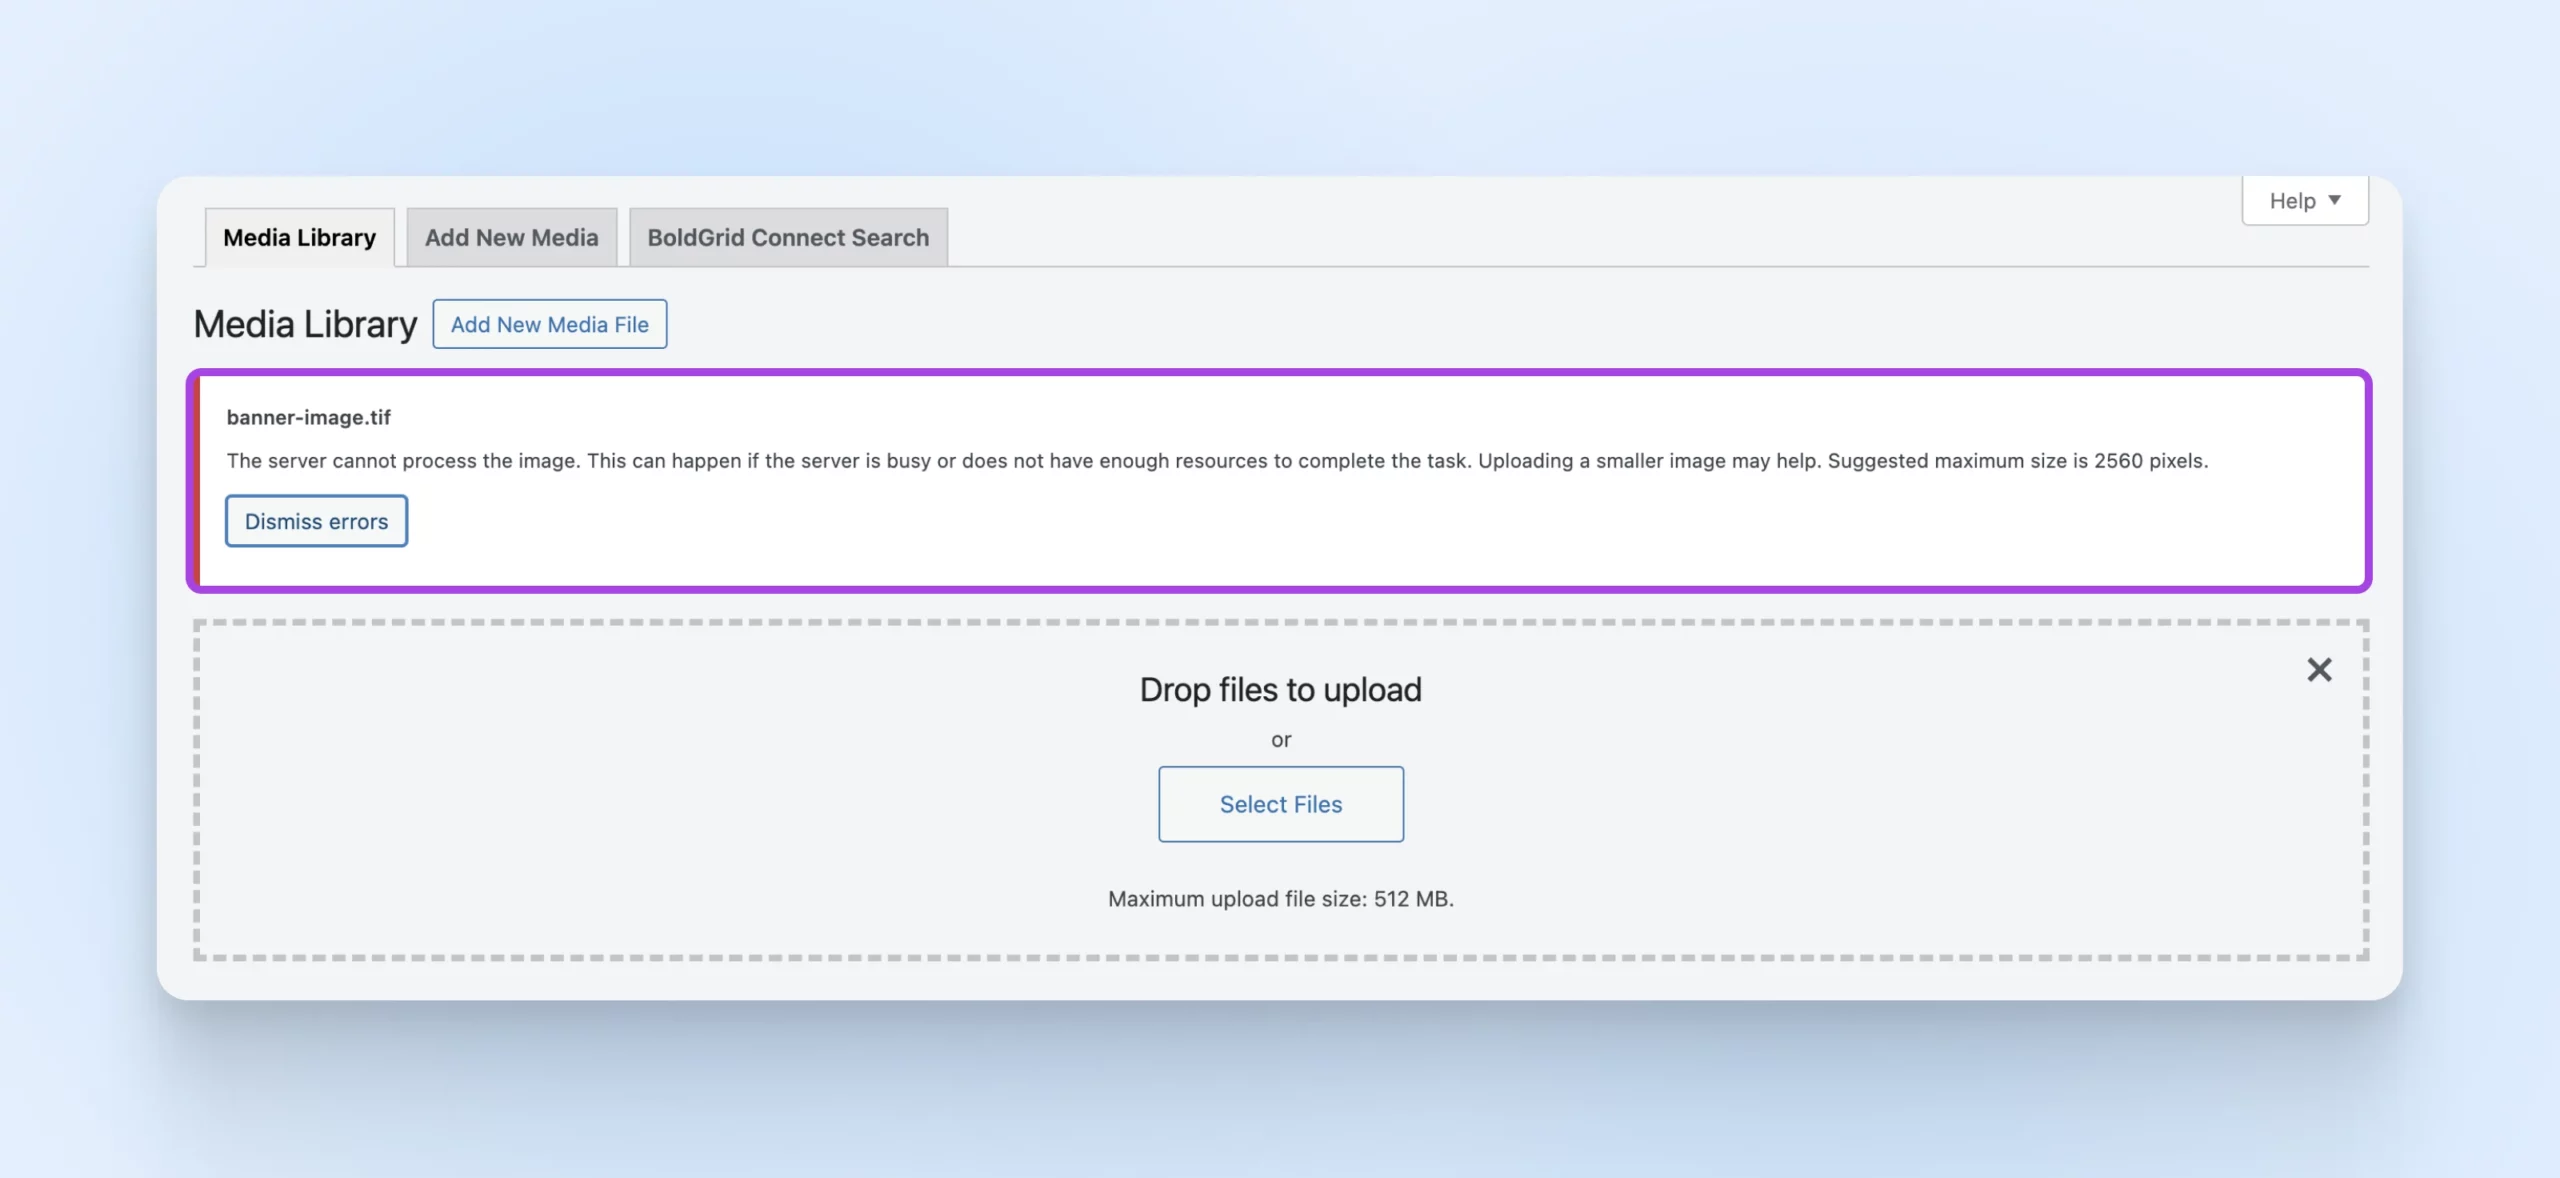
The good news? We’re going to walk you through the steps we take to identify and fix image upload issues in WordPress.
We’ll Fix Your Image Upload Issue
Skip the troubleshooting when you sign up for DreamPress, our managed WordPress hosting. Friendly WordPress experts are available 24/7 by chat, email, or ticket to help solve website problems — big or small.
Common WordPress Image Upload Errors And How To Fix Them (6 Methods)
The last thing you want is your workflow interrupted by a vague error message. Below are six ways to fix upload errors, so you can start adding stunning images to your website. Pronto.
1. Adjust The Image File Name And File Size
If you’re only encountering issues with a specific image file, you can start by looking at the file name. If you’re using special characters ($, *, &, #) or accent letters (ñ, á, é), these can cause issues with the WordPress media library. Rename the file with plain letters, numbers, and hyphens, then try again.
File Manager
A file manager is a software application that enables users to manage their files. It typically provides a Graphical User Interface (GUI) where people can browse through their files, open them, edit them, and save them.
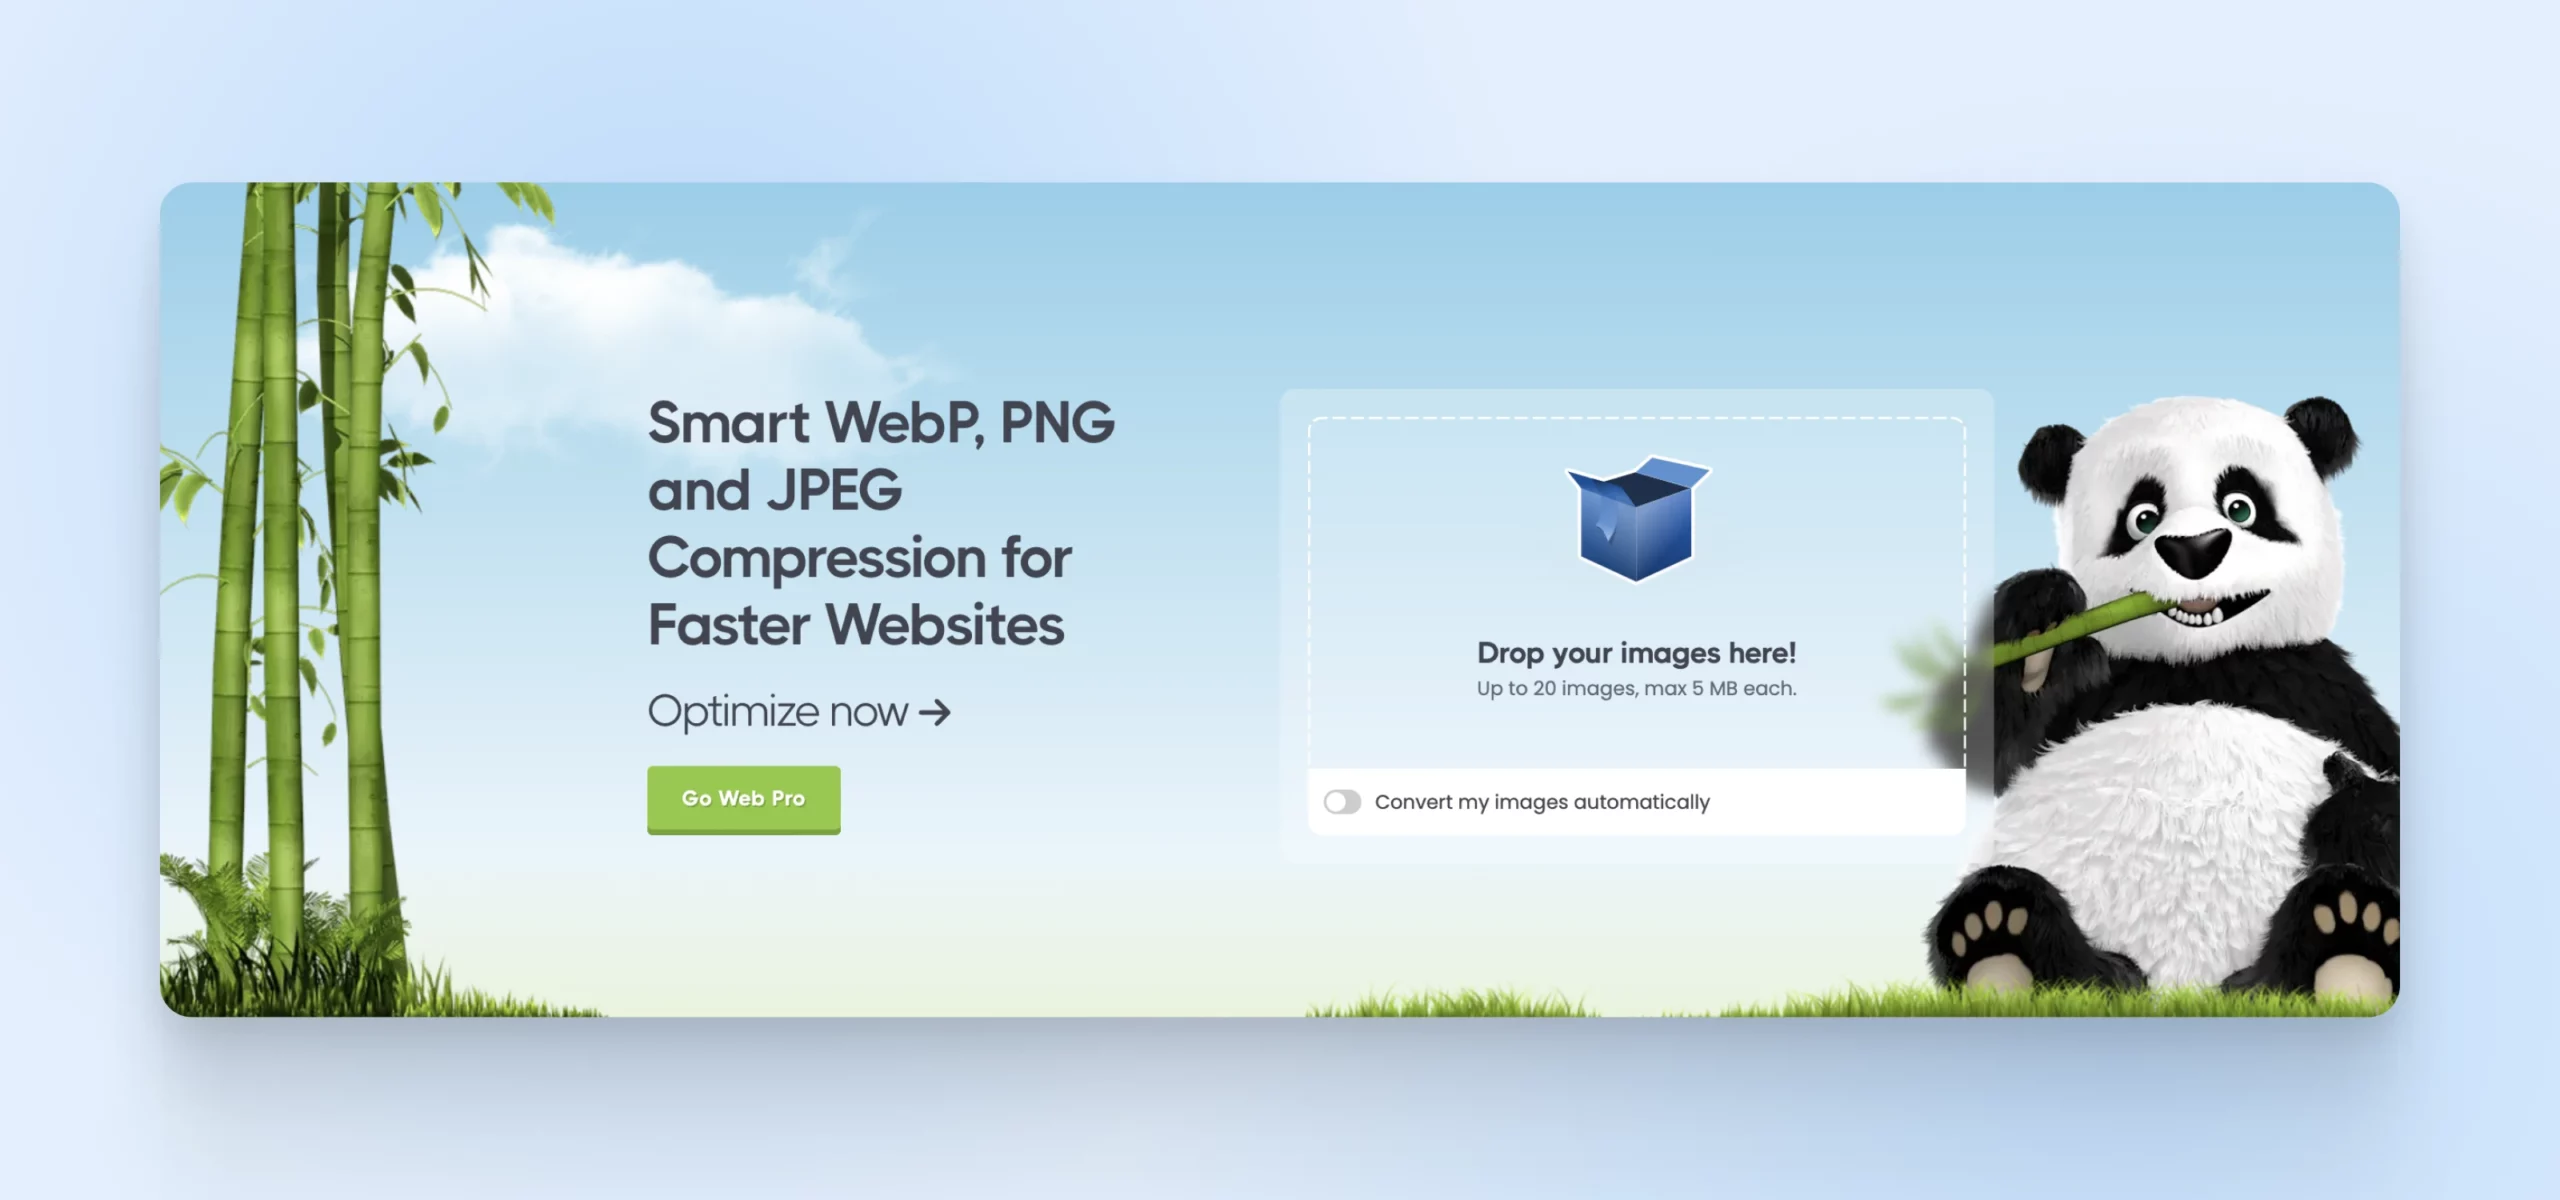
The image may also be too large — both, in terms of dimensions and file size. You can change an image’s dimensions using your favorite editing program. If you’re trying to upload a particularly high-resolution graphic, you can reduce its file size, often without a noticeable loss in visual quality, using a compression tool such as TinyPNG.
If you regularly encounter issues due to file size, then your server’s upload limit may be set too low. Check your host’s documented procedure before changing PHP upload limits. On DreamHost, follow the PHP upload-limit guide to edit the phprc file for your site’s active PHP version. If you use another host, follow its control-panel documentation or ask support where and how to change upload_max_filesize, post_max_size, and max_execution_time.
upload_max_filesize = 128M
post_max_size = 128M
max_execution_time = 300
If your site doesn’t already contain this file, you can create one inside the folder for the current PHP version your site is running. Then, simply add the above code at the end of the file.
2. Increase The Memory Limit Of Your WordPress Site
When you try to upload an image, you might encounter the WordPress HTTP error. This can sometimes be caused by low server resources or unusual traffic. For this reason, it’s always worth waiting a few minutes and then attempting to re-upload the image.
If the issue doesn’t resolve itself, then you may be exceeding the WordPress memory limit. You can increase the amount of memory that PHP can use on your server by connecting to your site over SFTP.
SFTP
Secure File Transfer Protocol (SFTP) is a safer version of the FTP protocol that uses a secure shell data stream.
Next, open your wp-config file. You can then add the following, which will increase the limit to 256MB:
define( 'WP_MEMORY_LIMIT', '256M' );
You can also define your WP_MAX_MEMORY_LIMIT in the same way, should you want to try overriding the memory limit specifically for backend tasks.
If you’re still unable to upload visual content, your server’s image processor is worth a look. WordPress edits images through either the GD library or the Imagick PHP module, depending on which one is available on your server — it ships an image editor class for each.
Some hosts limit the resources Imagick can use. If you suspect that’s the problem, you can try capping Imagick at a single processing thread by adding the following to your .htaccess file:
SetEnv MAGICK_THREAD_LIMIT 1
Remember to check with your host before changing thread limits.
Related: How To Fix The WordPress Memory Exhausted Error By Increasing Your Site’s PHP Memory Limit
3. Deactivate Your Plugins
Third-party software can sometimes interfere with your image uploads. If you’re using any plugins, it’s always worth deactivating each one individually and testing to see whether this resolves your image upload issue.
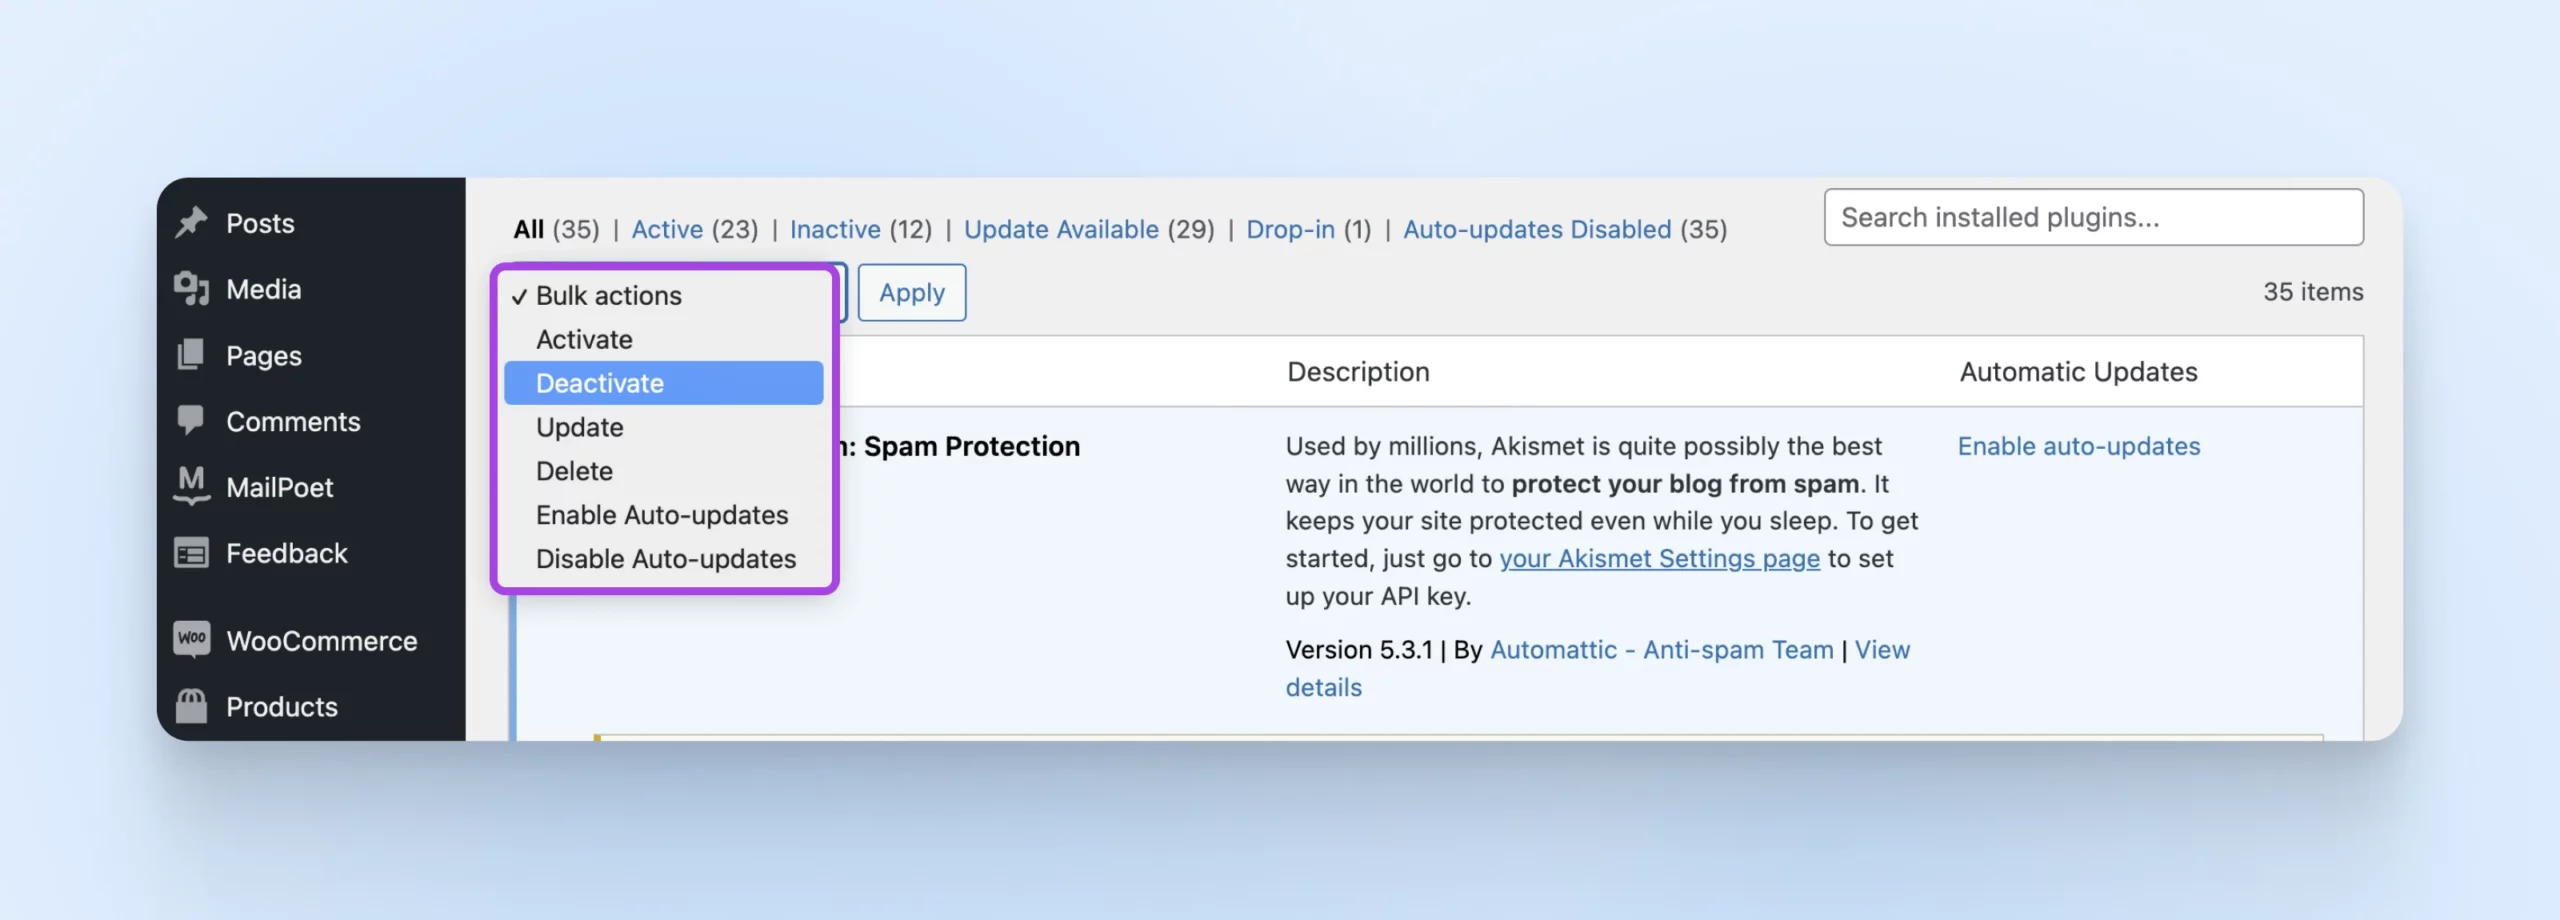
If a plugin is to blame, you can double-check to make sure you’re running the latest version. If you’ve fallen behind on your updates, you may be struggling with a problem that’s already been resolved in recent updates.
However, if you are in fact running the latest version, we recommend contacting the plugin’s developer to make sure that they’re aware of the issue. This can also be an opportunity to ask whether they plan to solve this problem in their next release. If the plugin is critical to your site and there’s no fix on the horizon, it might be time to look for an alternative solution.
Related: The Beginner’s Guide To WordPress Plugins
4. Clear Your Site’s Cache
If you’re using a caching plugin, then clearing the cache may be enough to resolve your image upload issues. We should mention, however, that it’s incredibly rare for the cache to prevent a file upload, so we’re including this fix out of an abundance of caution.
If you think that caching could be causing the error, the steps you take will depend on your chosen caching solution. For example, if you’re using the W3 Total Cache plugin, you can clear the cache by selecting Performance > Purge All Caches from the WordPress toolbar.
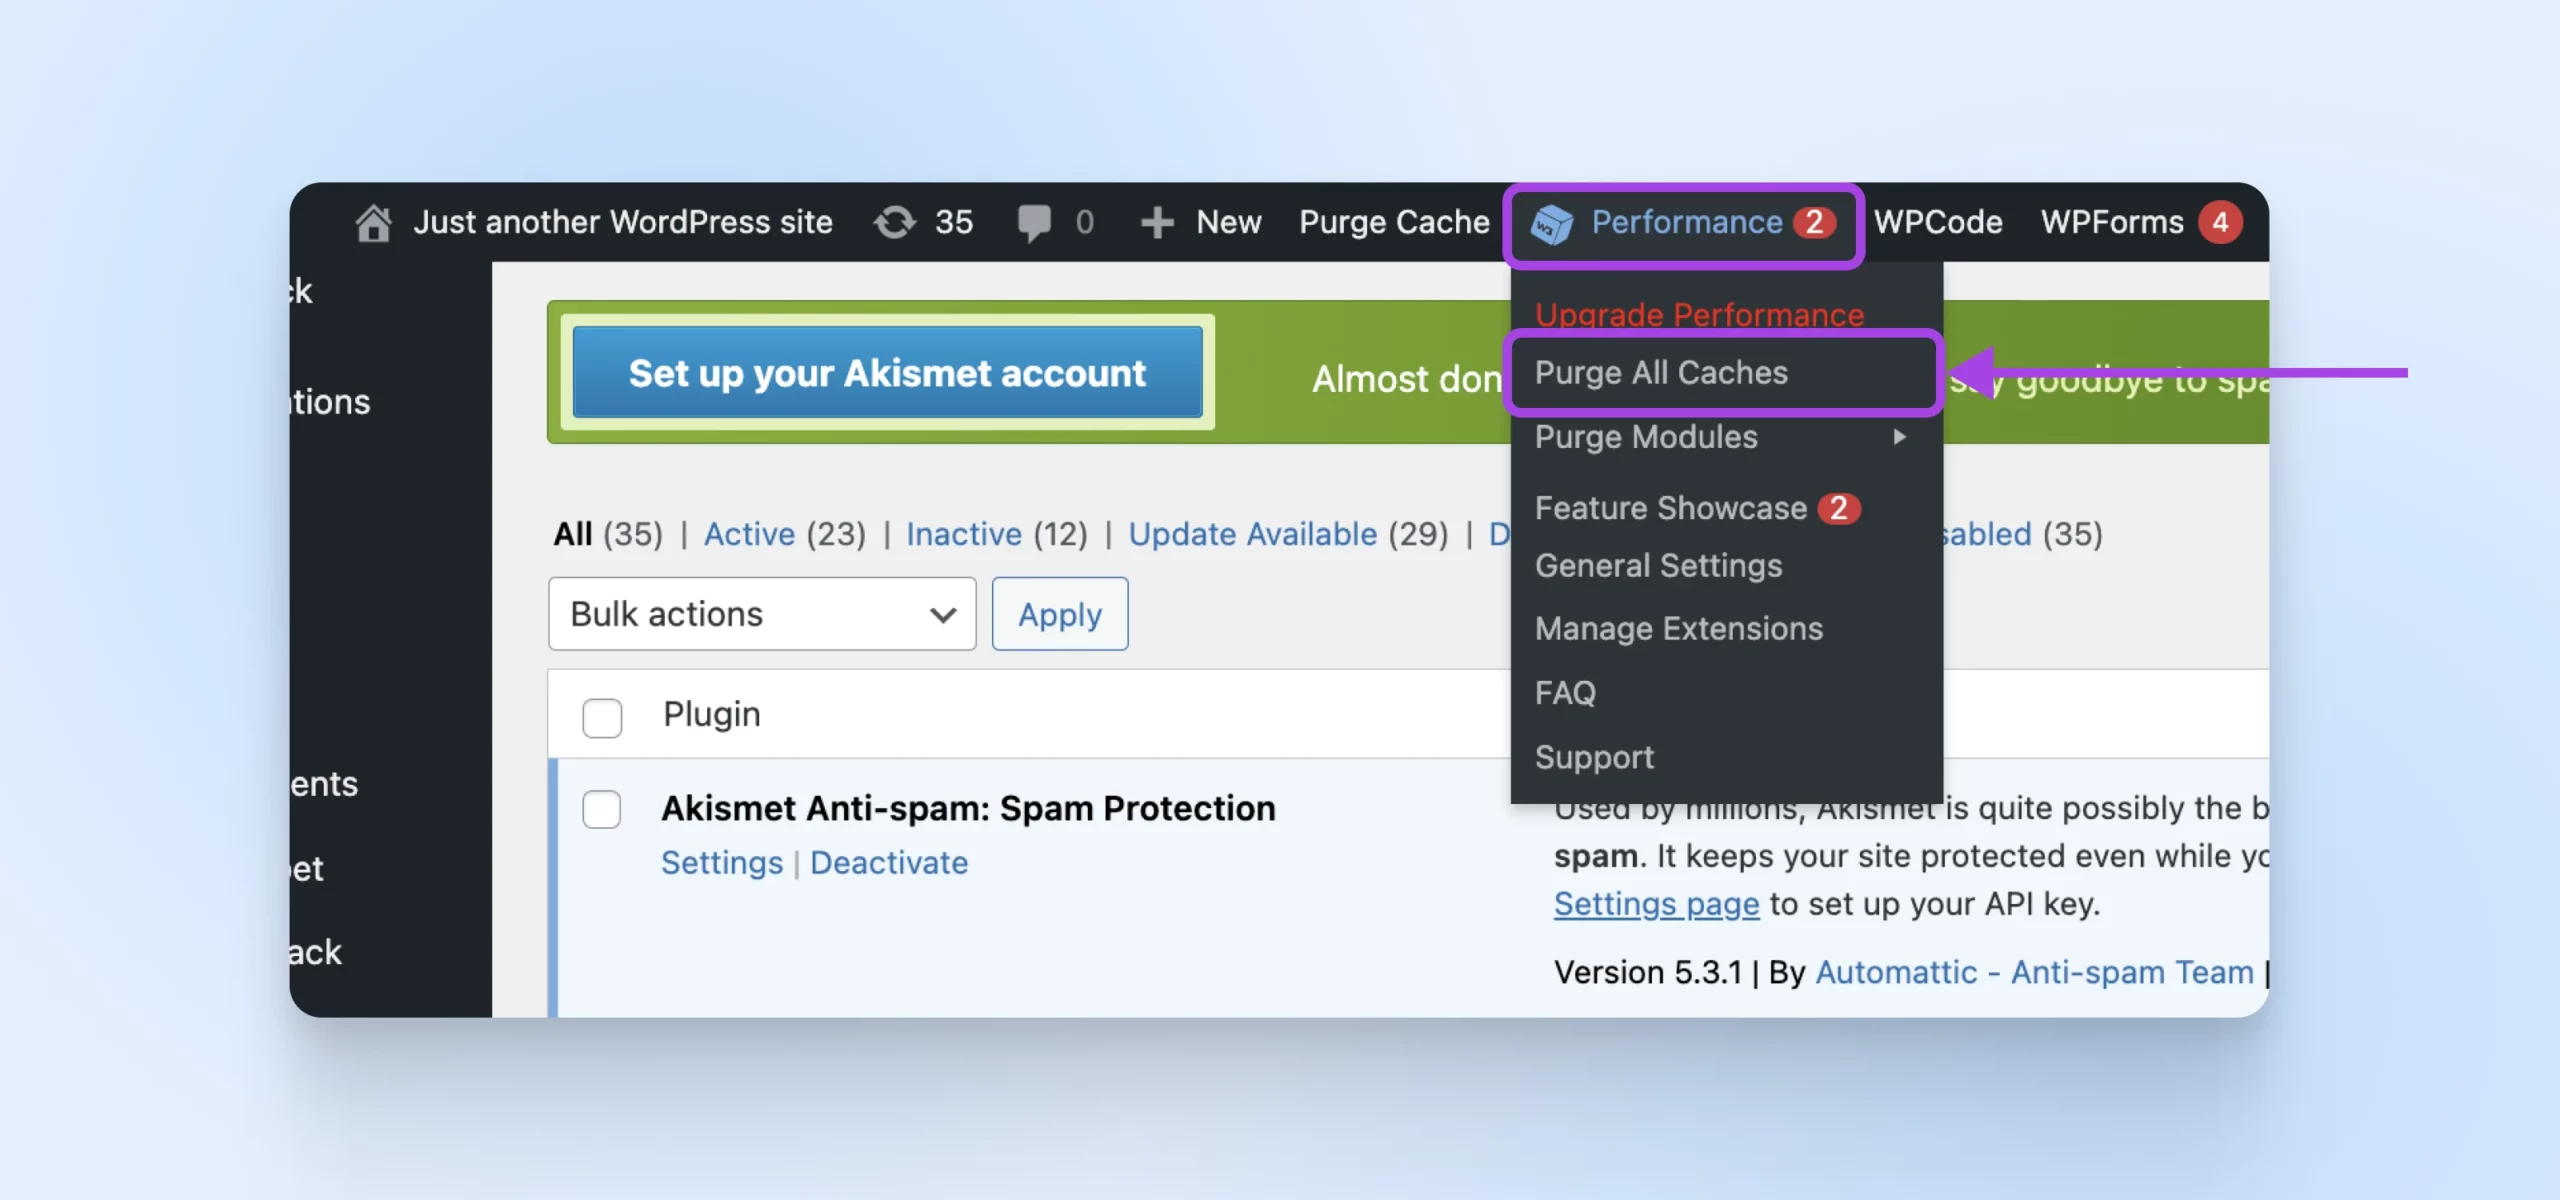
If you’re unsure how to clear the cache in your specific tool, the plugin’s settings menu is often a good place to start. You can also check the developer’s official documentation for more details.
5. Check Your Uploads Folder Permissions
If WordPress shows a message like “Unable to create directory wp-content/uploads” or “The uploaded file could not be moved to wp-content/uploads,” it means WordPress can’t write files to your uploads folder. Incorrect permissions are one possible cause. Check them first; if they are already correct, your host may need to check folder ownership and available storage.
Connect to your site over SFTP, open the wp-content folder, right-click the uploads directory, and choose File Permissions (the wording varies by client). For shared hosting configurations, the WordPress Advanced Administration Handbook recommends setting directories to 755 (or 750) and files to 644 (or 640) — and it warns that no directory should ever be set to 777, not even the uploads folder.
Apply 755 (or 750) only to the uploads directory and its subdirectories, and apply 644 (or 640) only to files within them. Then head back to the WordPress dashboard and try the upload again. If the error persists, contact your host — the folder may be owned by the wrong user account, which is something they can correct on the server side.
6. Try The Browser Uploader
Still having issues? If you’ve tried all of the above fixes but the problem persists, you can use WordPress’s fallback uploader. WordPress provides two uploader methods: the default Multi-File Uploader, which supports drag and drop and multiple file selection, and the simpler Browser Uploader, which handles one file at a time. It’s a useful workaround when you need to upload an image quickly.
To access it, navigate to Media > Add New Media File. You can then select the browser uploader link.
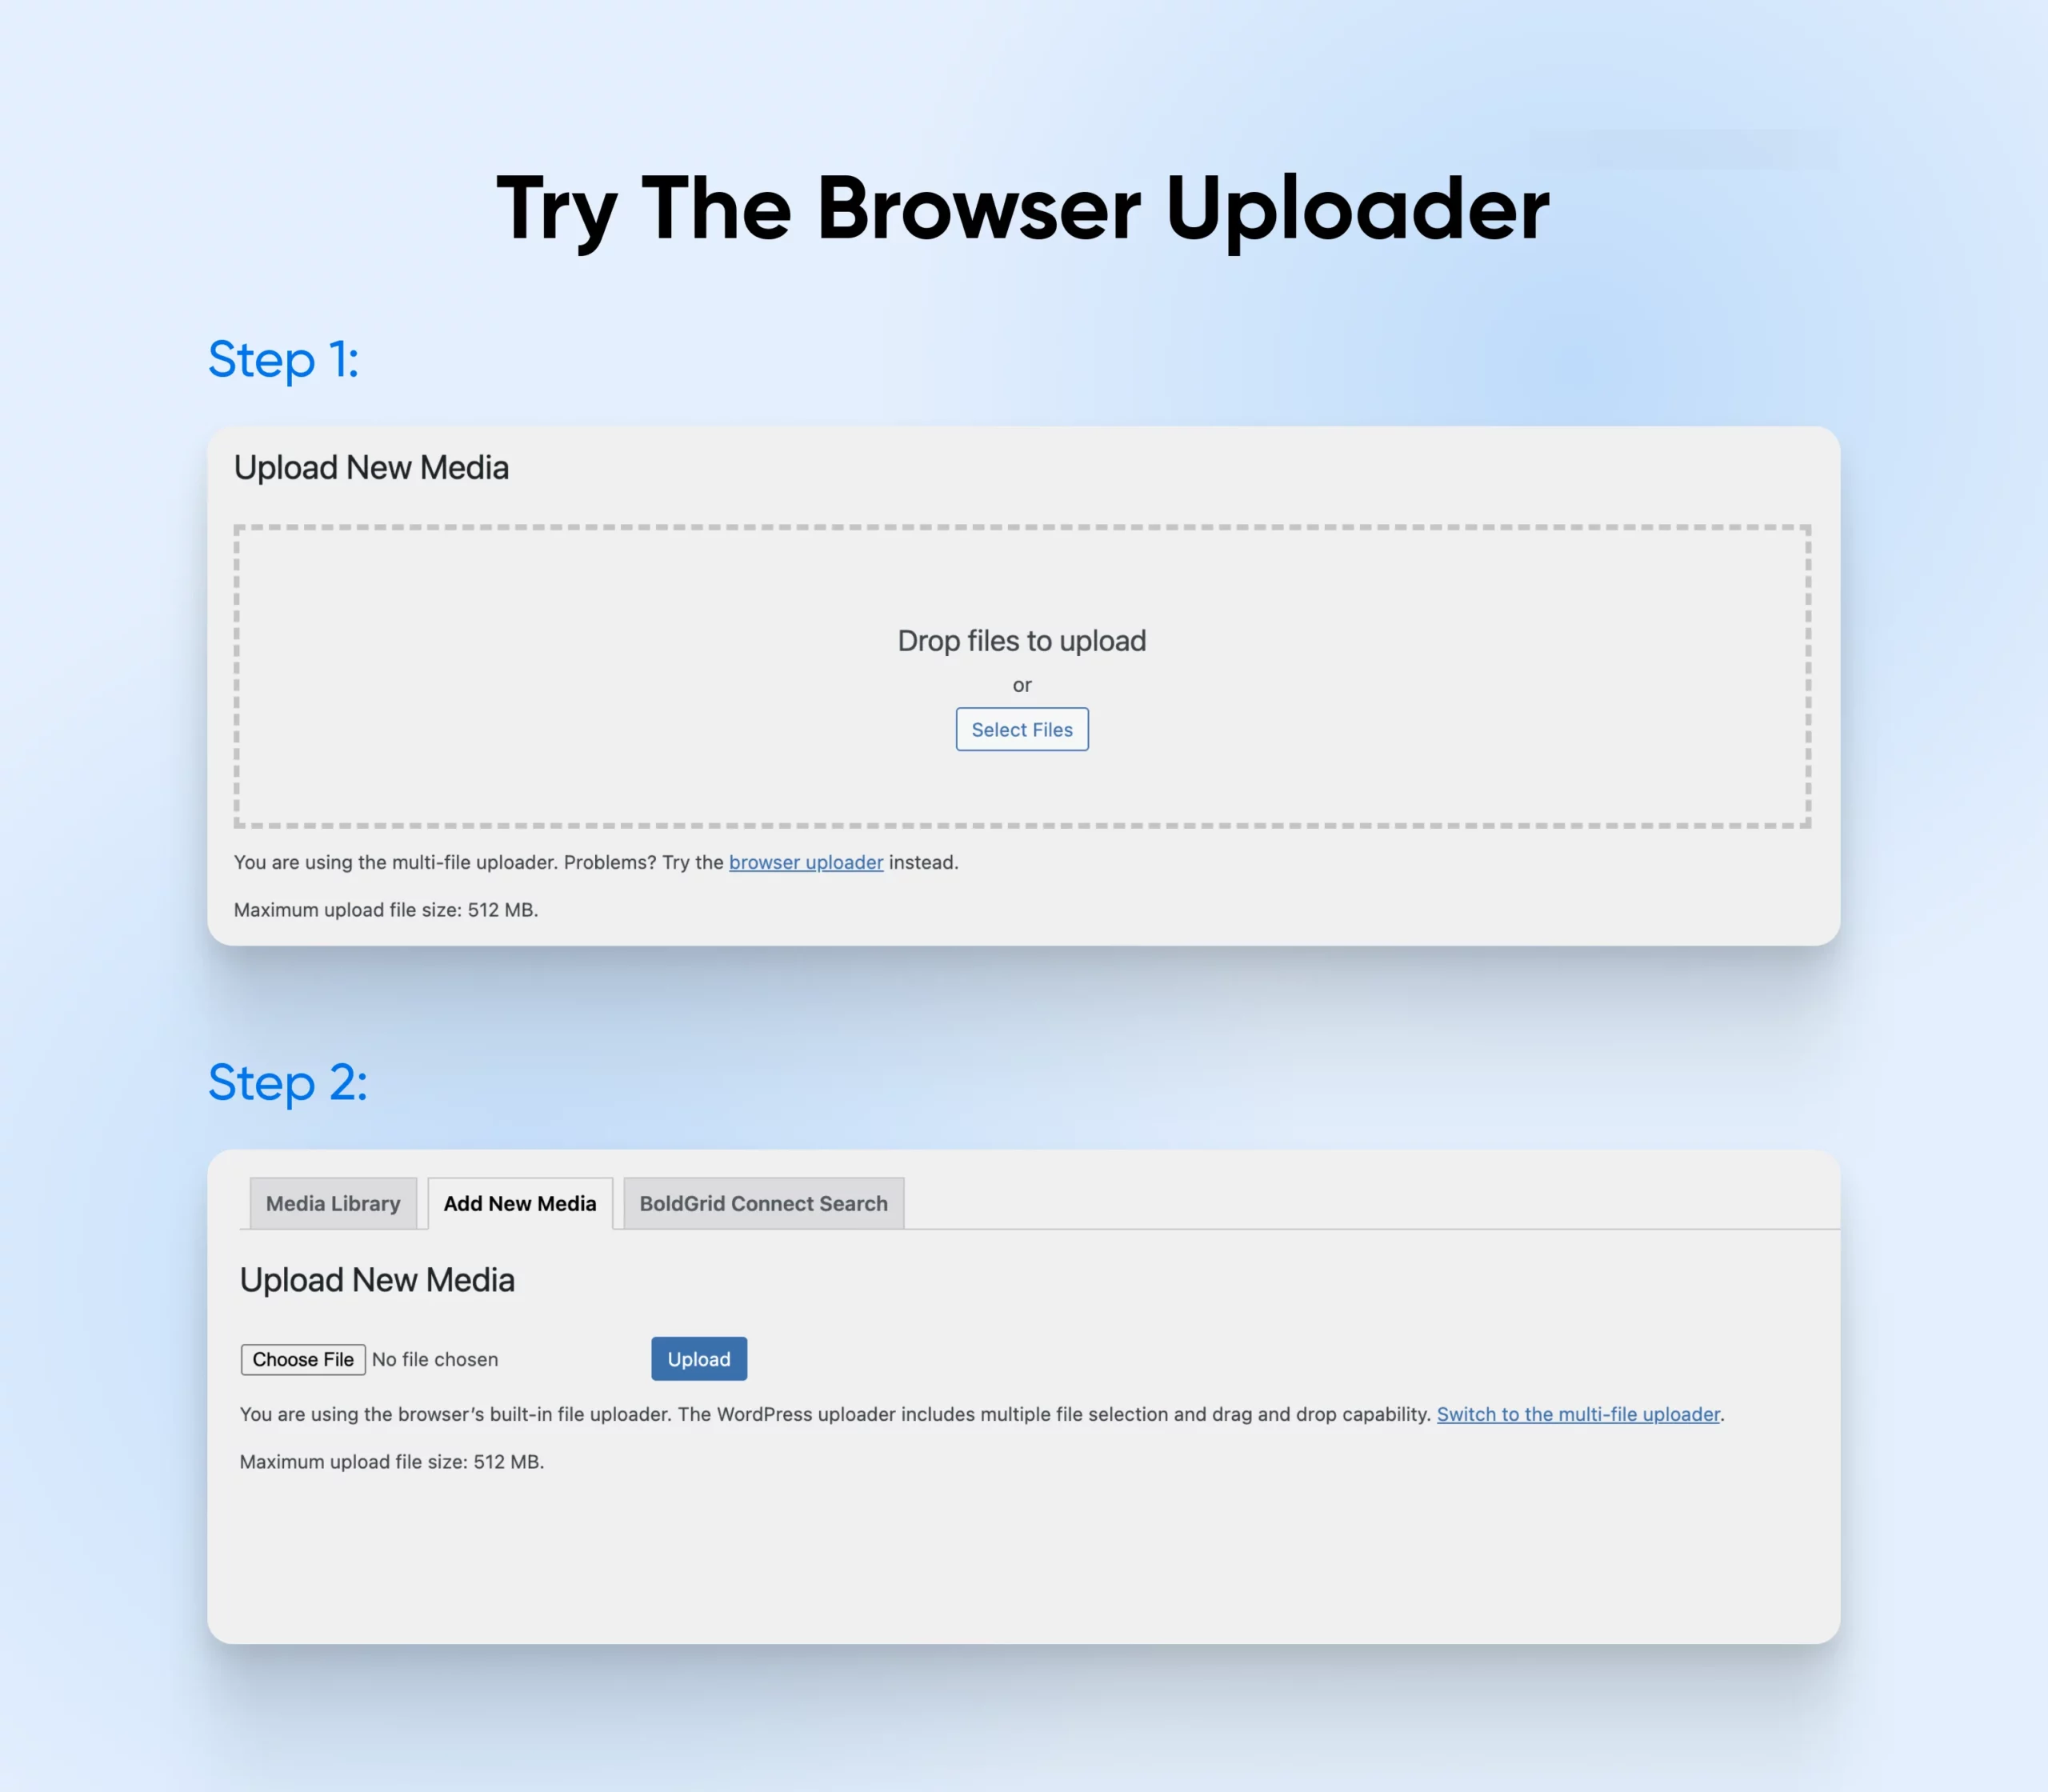
Next, click on Choose File. This launches the familiar file selection dialog, where you can upload the image as you normally would. If this workaround succeeds, we recommend trying to upload an image using WordPress’s standard image uploader afterward — just to check whether it resolved your issue.
FAQs About Fixing Image Upload Issues In WordPress
Have more questions? Luckily, we have an endless supply of answers. Here are some of the most common requests!
Why am I getting an HTTP error when uploading images?
The WordPress HTTP error is a generic upload failure, and in most cases it’s caused by one of the following issues:
- The images you’re uploading exceed the file size limits
- Your site is hitting its PHP memory limit while processing the image
- Plugin conflicts are interfering with uploads
- There are problems with your browser’s cache
Work through methods 1 to 4 above in order — they cover each of these causes.
Why are my images not showing up in the WordPress media library?
If uploads appear to succeed but the images don’t display in the Media Library, the usual suspects are incorrect permissions on the wp-content/uploads folder, a plugin conflict (image optimization and security plugins are common culprits), or a stale browser cache. Fix the folder permissions first (see method 5), then deactivate plugins one at a time, and finally do a hard refresh of your browser.
What does “The uploaded file could not be moved to wp-content/uploads” mean?
This message means the file reached your server, but WordPress couldn’t write it into the uploads directory. Check the permissions on the wp-content/uploads folder (see method 5), and confirm your hosting account hasn’t run out of storage space. If neither fixes it, ask your host to check the folder’s ownership.
Why are my image files taking so long to upload?
A slow internet connection, a large file size, server performance, or high traffic on your website could all be contributing factors. Here’s a detailed guide to fixing slow image uploads.
What is the “Unable To Create Directory” error?
Normally, this problem occurs when a plugin or script can’t create a new directory within your website’s file system. This can happen if the program has insufficient permissions to write to the target location, or is using a file path that doesn’t exist. Also, it can happen when your storage is full. Setting the correct permissions on the uploads folder (see method 5) resolves the most common version of this error.
Additional WordPress Error Tutorials
Once you’ve solved your image upload error, the adventure isn’t over. There’s always more to learn about WordPress! We’ve put together several tutorials to help you troubleshoot other common WordPress errors:
- How to Fix Common SSL Issues In WordPress
- How To Troubleshoot The WordPress White Screen Of Death
- How To Fix The 500 Internal Server Error In WordPress
- How To Fix Syntax Errors In WordPress
- How To Fix The WordPress Not Sending Email Issue
- How To Fix The Error Establishing Database Connection
- How To Fix WordPress Error 404 Not Found
- How To Fix White Text And Missing Buttons In WordPress Visual Editor
- How To Fix The Sidebar Below Content Error In WordPress
- What To Do When You’re Locked Out Of The WordPress Admin Area
- How To Fix The WordPress Login Page Refreshing And Redirecting Issue
Want more information on managing a WordPress site? Check out our WordPress Tutorials, a collection of guides designed to help you navigate the WordPress dashboard like an expert.
WordPress Images Made Easy
Visuals are crucial for catching (and holding) your visitors’ attention, but image upload issues are frustratingly common. By following our simple steps, we’re confident that you can get your site back on track — even when the error message itself doesn’t provide much information.
Let’s quickly recap six ways to resolve common WordPress image upload issues:
- Rename, resize, and re-upload the image
- Increase the memory limit
- Deactivate your plugins
- Clear the cache
- Fix your uploads folder permissions
- Try the browser uploader
Tired of troubleshooting WordPress errors on your own? Every DreamPress plan includes 24/7 support from WordPress experts, daily automated backups, and unmetered bandwidth — so when something breaks, you’re never fixing it alone.
Sign up today to try the DreamHost experience for yourself!