Eye-catching images and videos are a great way to impress online visitors. However, nearly every website uses them to enhance the user experience (UX). Therefore, adding these standard visuals to your pages is no longer enough to make your site stand out from the crowd.
Fortunately, you can add Lottie animations to your site to give you a competitive edge. LottieFiles provides a free library of animations you can easily add to your website. Then, you can use them to boost user engagement and enhance your site’s design.
In this post, we’ll take a closer look at some key benefits of using Lottie animations on your site. Then, we’ll show you three simple ways to add these visual elements. Let’s get started!
The Benefits of Adding Lottie Animations to Your Site
While videos and images can make your website more engaging, these kinds of visuals are seen all over the internet. On the other hand, animations can give you a unique edge.
Plus, the predicted global market for the animation industry is expected to rise by 60% over the next nine years. That means if you start using them now, you can get ahead of a growing trend.
In fact, 61% of marketers used interactive content as a digital engagement tactic last year. Other strategies included GIFs, which can also be used to display animations.
Lottie animations are an excellent choice, largely due to their small file sizes:
In fact, these files are 600% smaller than GIFs – You can add them to your site without weighing anything down. This can allow you to preserve a positive UX.
Better yet, Lottie animations can be completely customized to suit your brand identity. On top of that, it’s an affordable solution since LottieFiles provides the most extensive, free animation library. You’ll get access to thousands of UI elements, characters, and illustrations.
How to Add Lottie Animations to Your Site (3 Ways)
Now that you know the benefits of using Lottie animations, let’s look at three ways to add them to your site.
Method 1: Add Your Animation with oEmbed
Adding your Lottie animations through oEmbed is the simplest method in this guide. The only downside is that you won’t be able to edit the animation settings or set them up to react to user interactions.
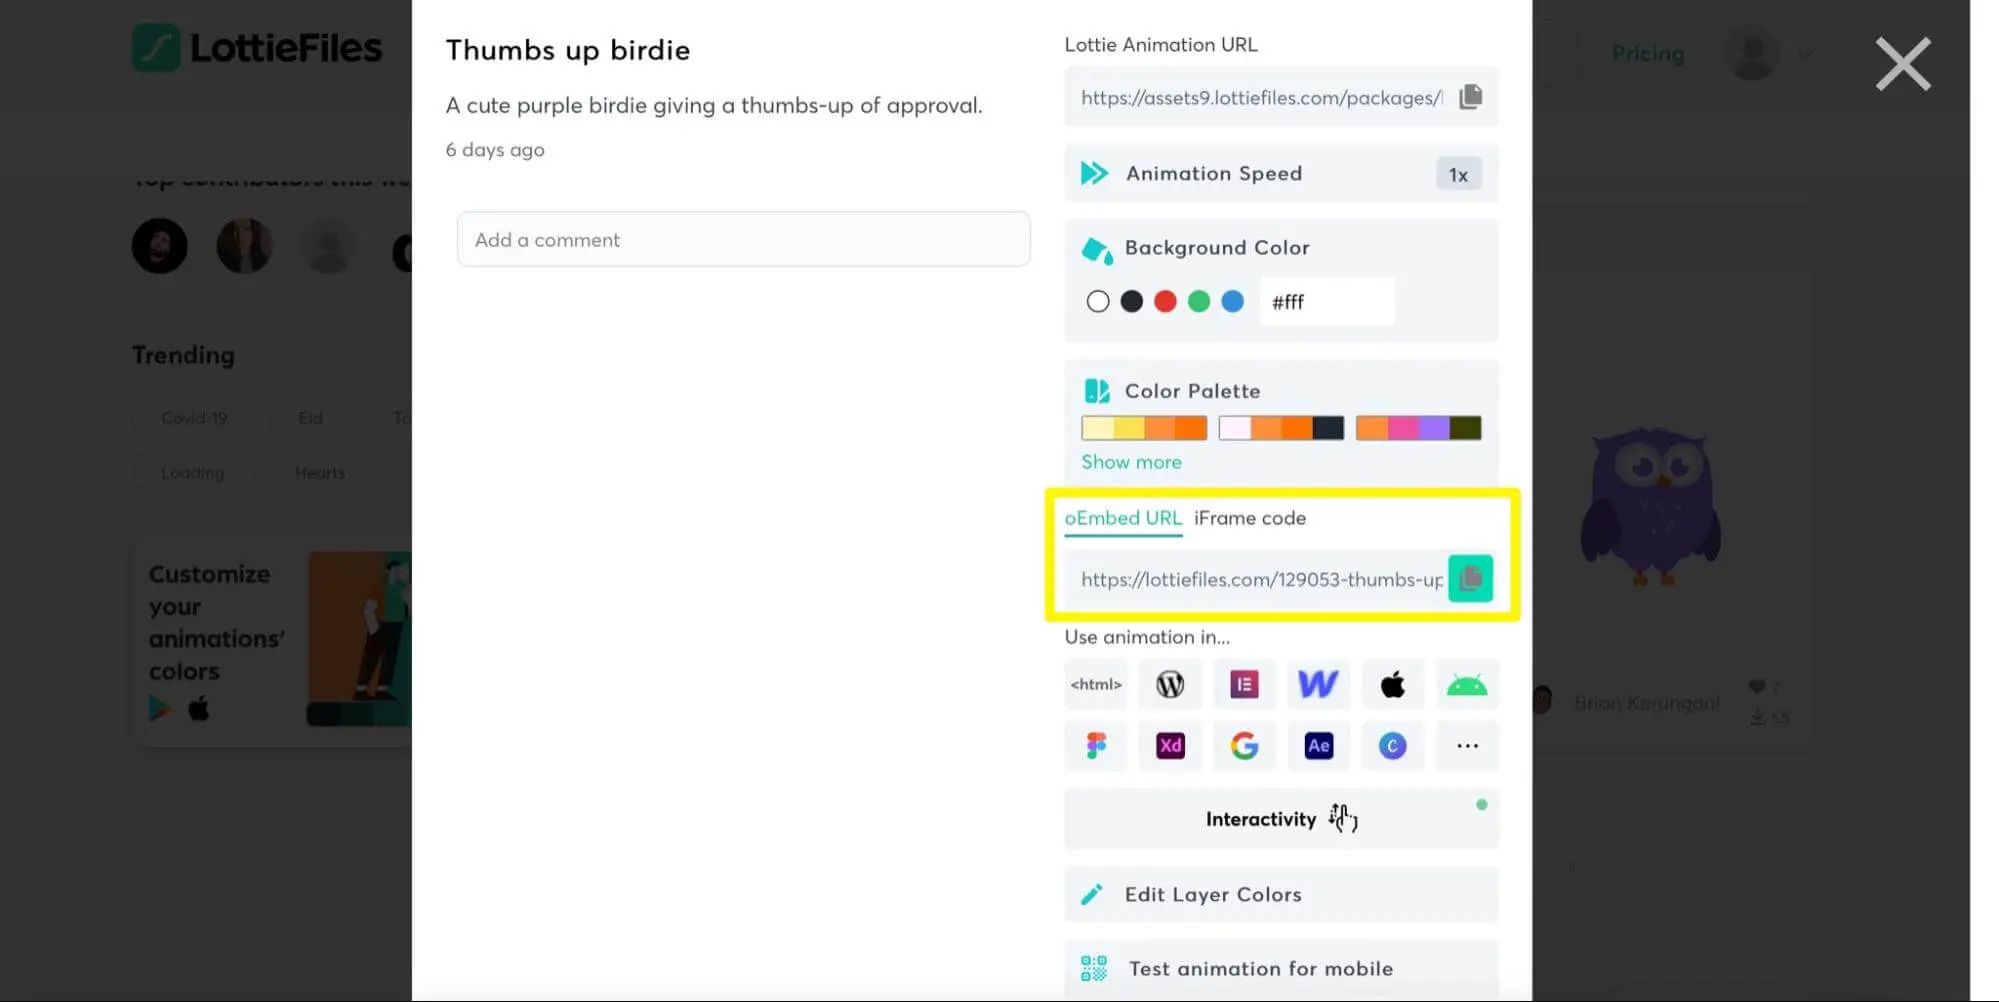
To get started with this method, browse the LottieFiles animations library to find the perfect animation for your site. Once you find a design that you like, click on the animation and simply copy the oEmbed URL (you will need to be logged into a free account to do this):
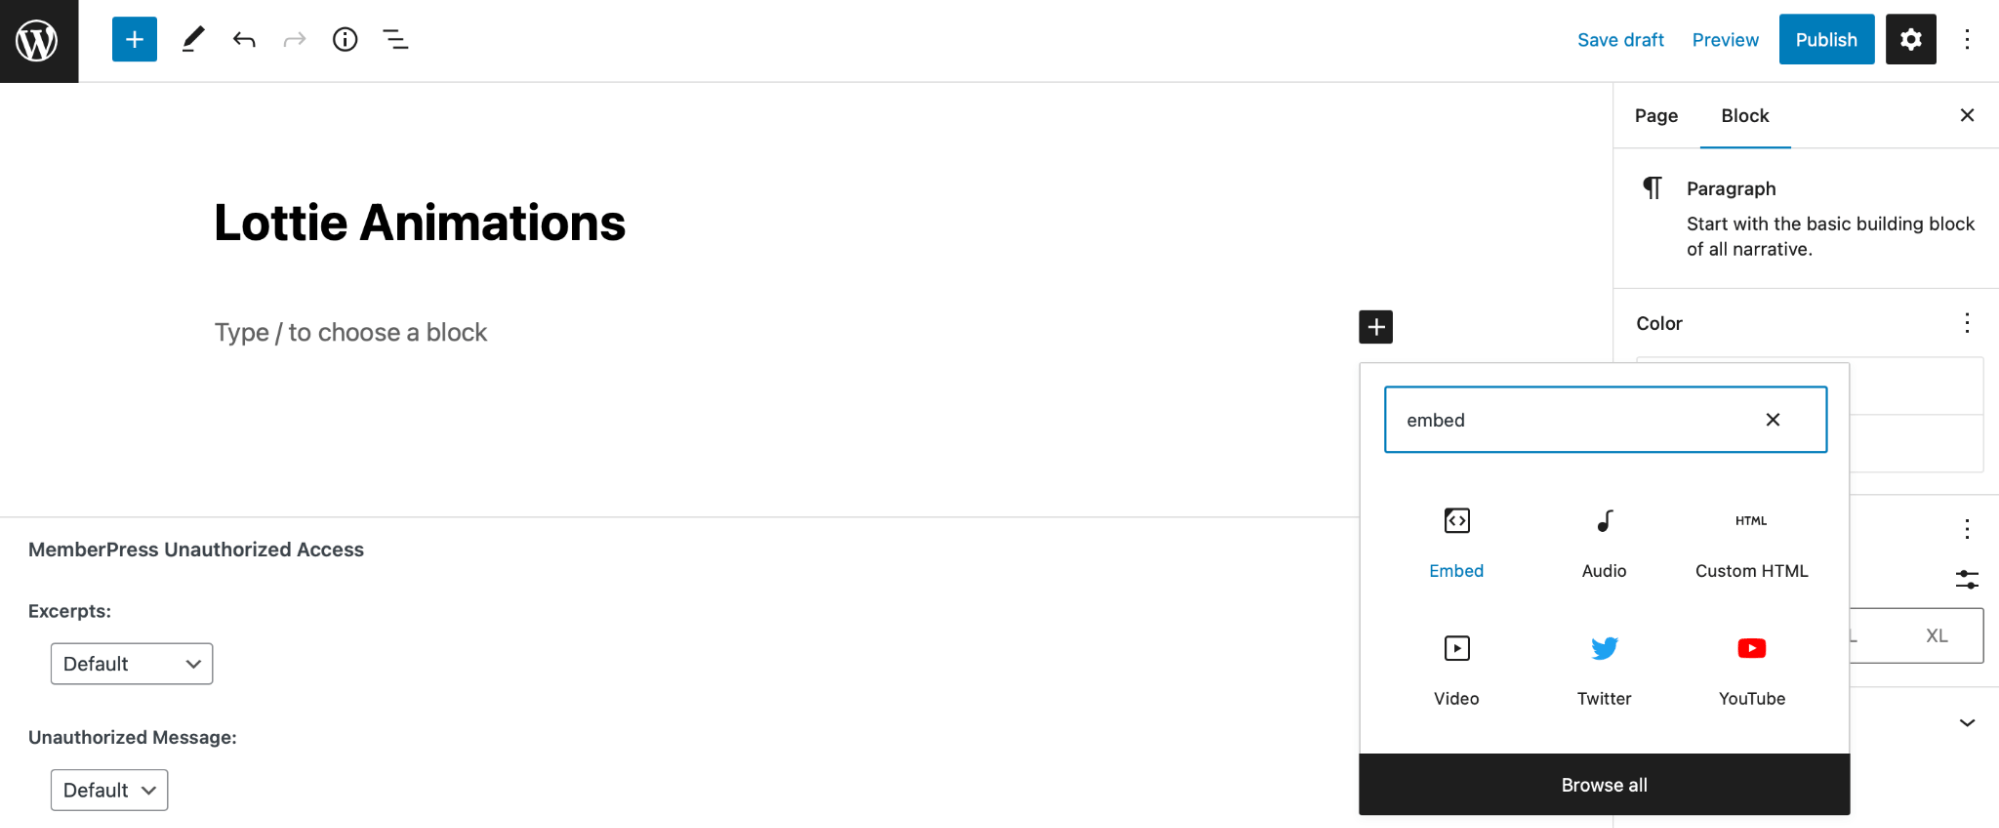
Then, head to WordPress and open the page or post where you want to include your animation. Next, simply add a new Embed Gutenberg block:
Now, paste the oEmbed URL that you copied from the Lottie website:

Hit the Embed button to confirm the action.
At this point, you should see the animation appear on your page:
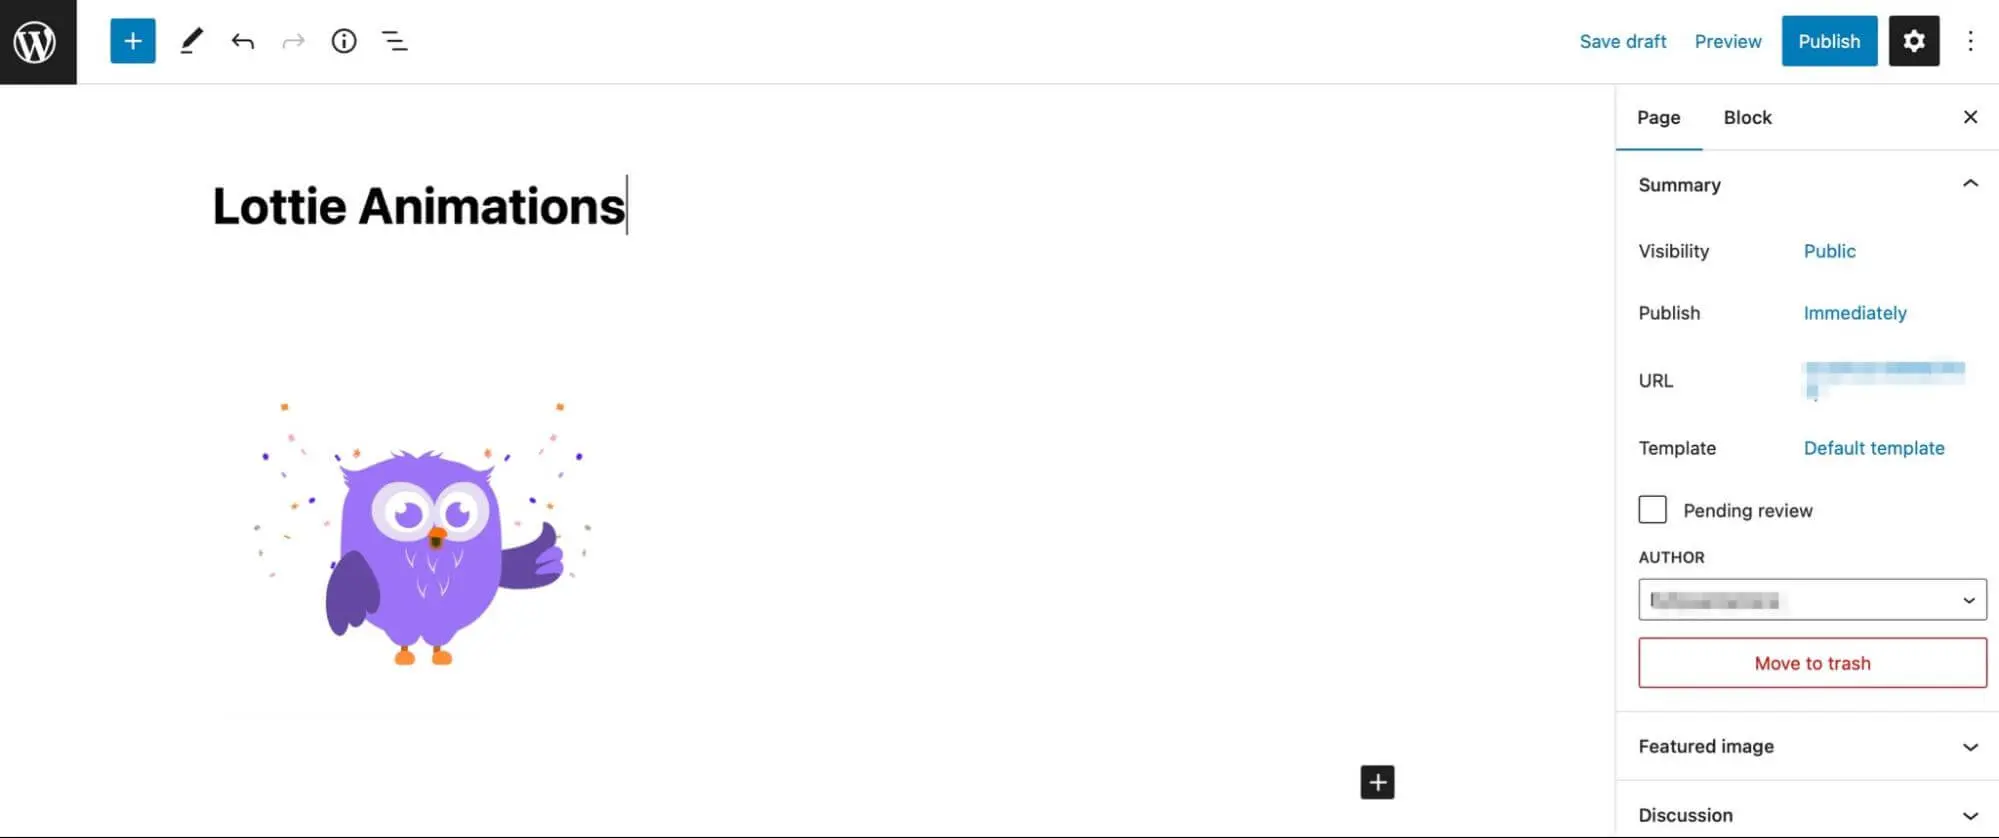
As we mentioned earlier, you won’t be able to customize the animation once you’ve added it to your WordPress page or post. Therefore, it’s crucial you make all the edits you want beforehand while you’re still on the Lottie website.
Method 2: Add Your Animation Using the Lottie block for Gutenberg Plugin
While the oEmbed method is the simplest, using the Lottie block for Gutenberg plugin is also very easy. Plus, it allows you to immediately preview any changes you make to your designs.
First off, go to Plugins > Add New to install and activate the Lottie block for Gutenberg plugin in WordPress:

You can then log into your LottieFiles account or create an account for free.
Next, add a new block in the Gutenberg editor. Search for the Lottie block and add it to your page:
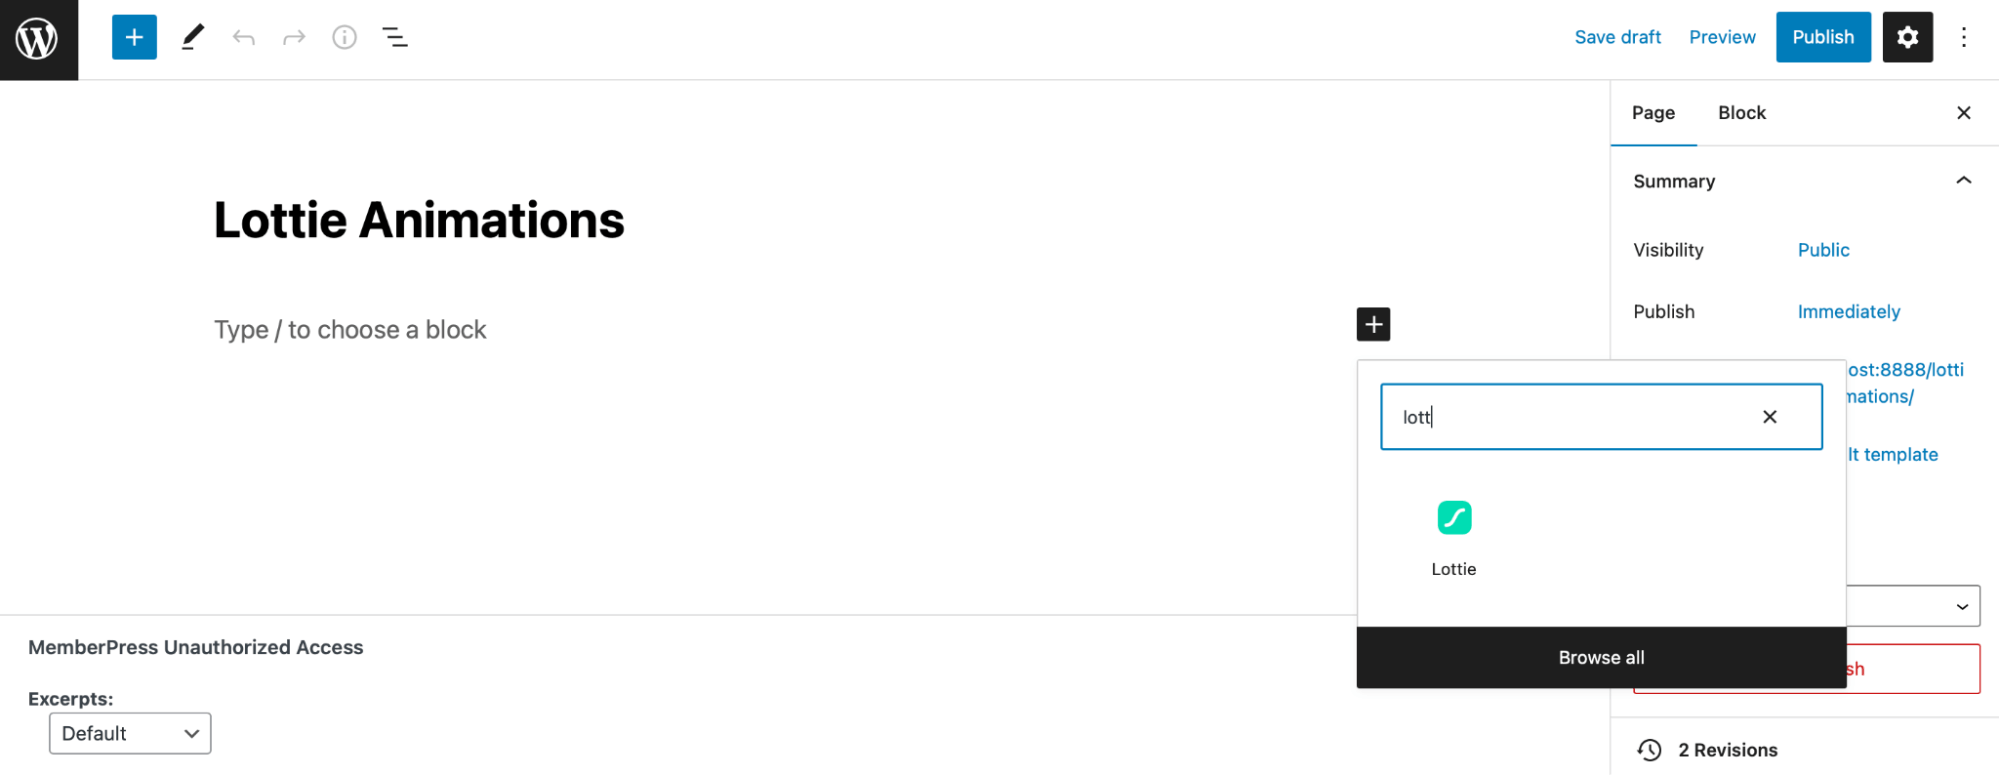
Here, you’ll find three ways to insert a Lottie animation in WordPress:
- Click on Discover animation to browse the LottieFiles library (you’ll need an account to do this).
- Select Media Library to find an animation you’ve previously uploaded.
- Hit Insert from url to paste a JSON link.
If you choose the final method, you can find the JSON link on the Lottie website:
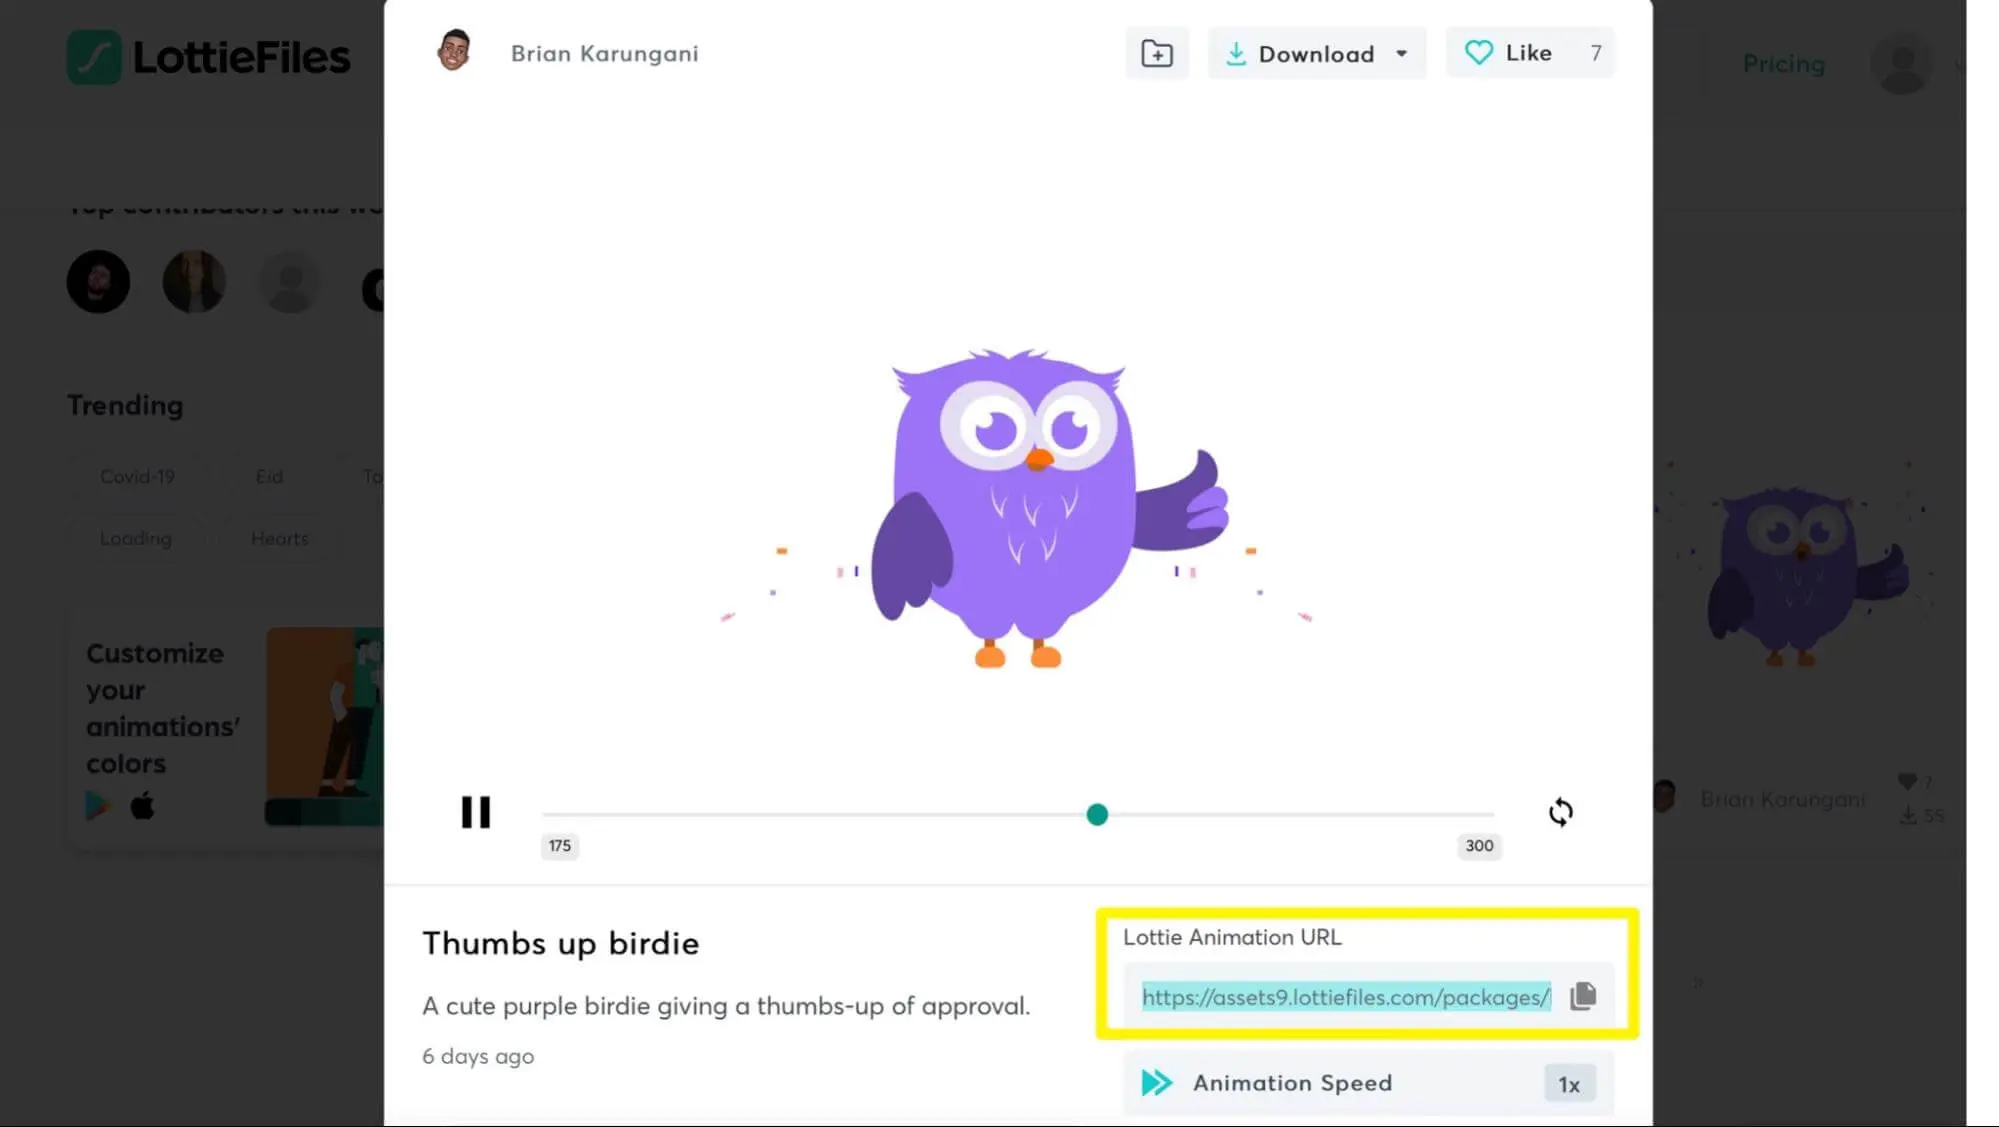
Once you’ve added the animation to your page, you can preview the design in Gutenberg:
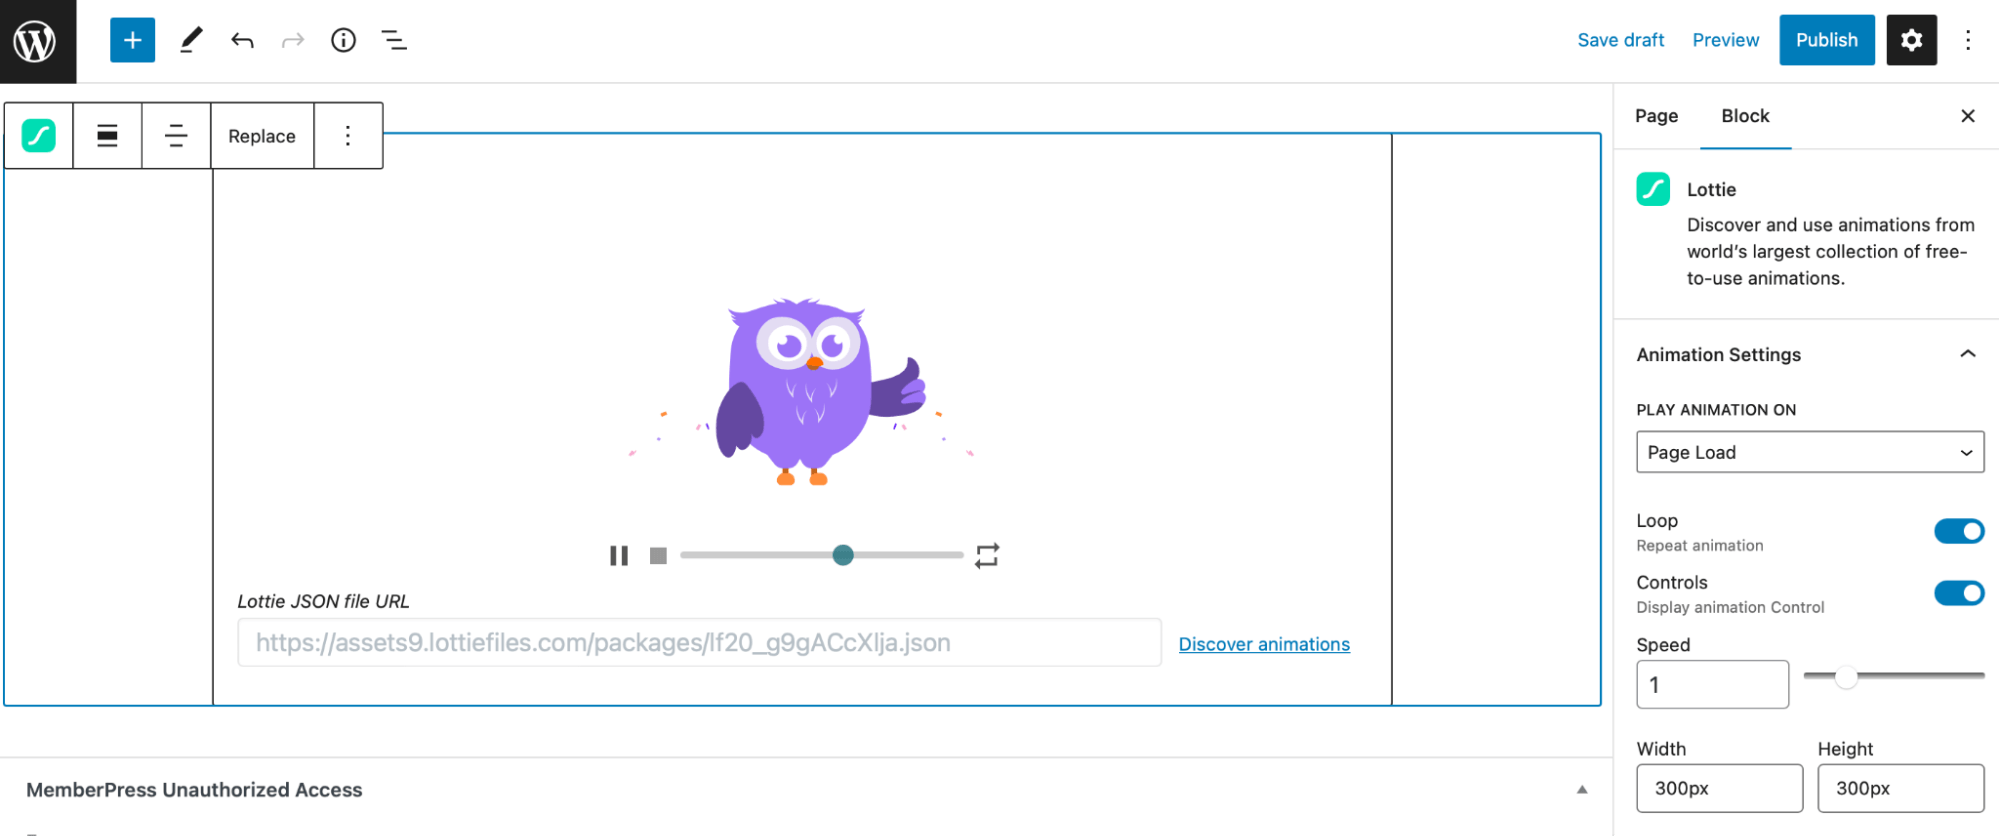
Now, in the Block settings, you can customize your animation. For instance, you can give it a transparent background, change the dimensions, or trigger the animation with different actions. You can also use the plugin to add a Lottie animation as a WordPress background.
Method 3: Add Your Animation with HTML and JavaScript
Adding your Lottie animation with HTML and JavaScript is still fairly easy, but it’s the most complex method. Plus, you aren’t able to see updates in real-time.
Instead, you have to switch between Gutenberg and your website to preview your changes. Still, you may want to use this method if you’re familiar with HTML and looking for enhanced customization options.
To get started with this approach, click on the animation in the LottieFiles library and copy the Lottie JSON file link:

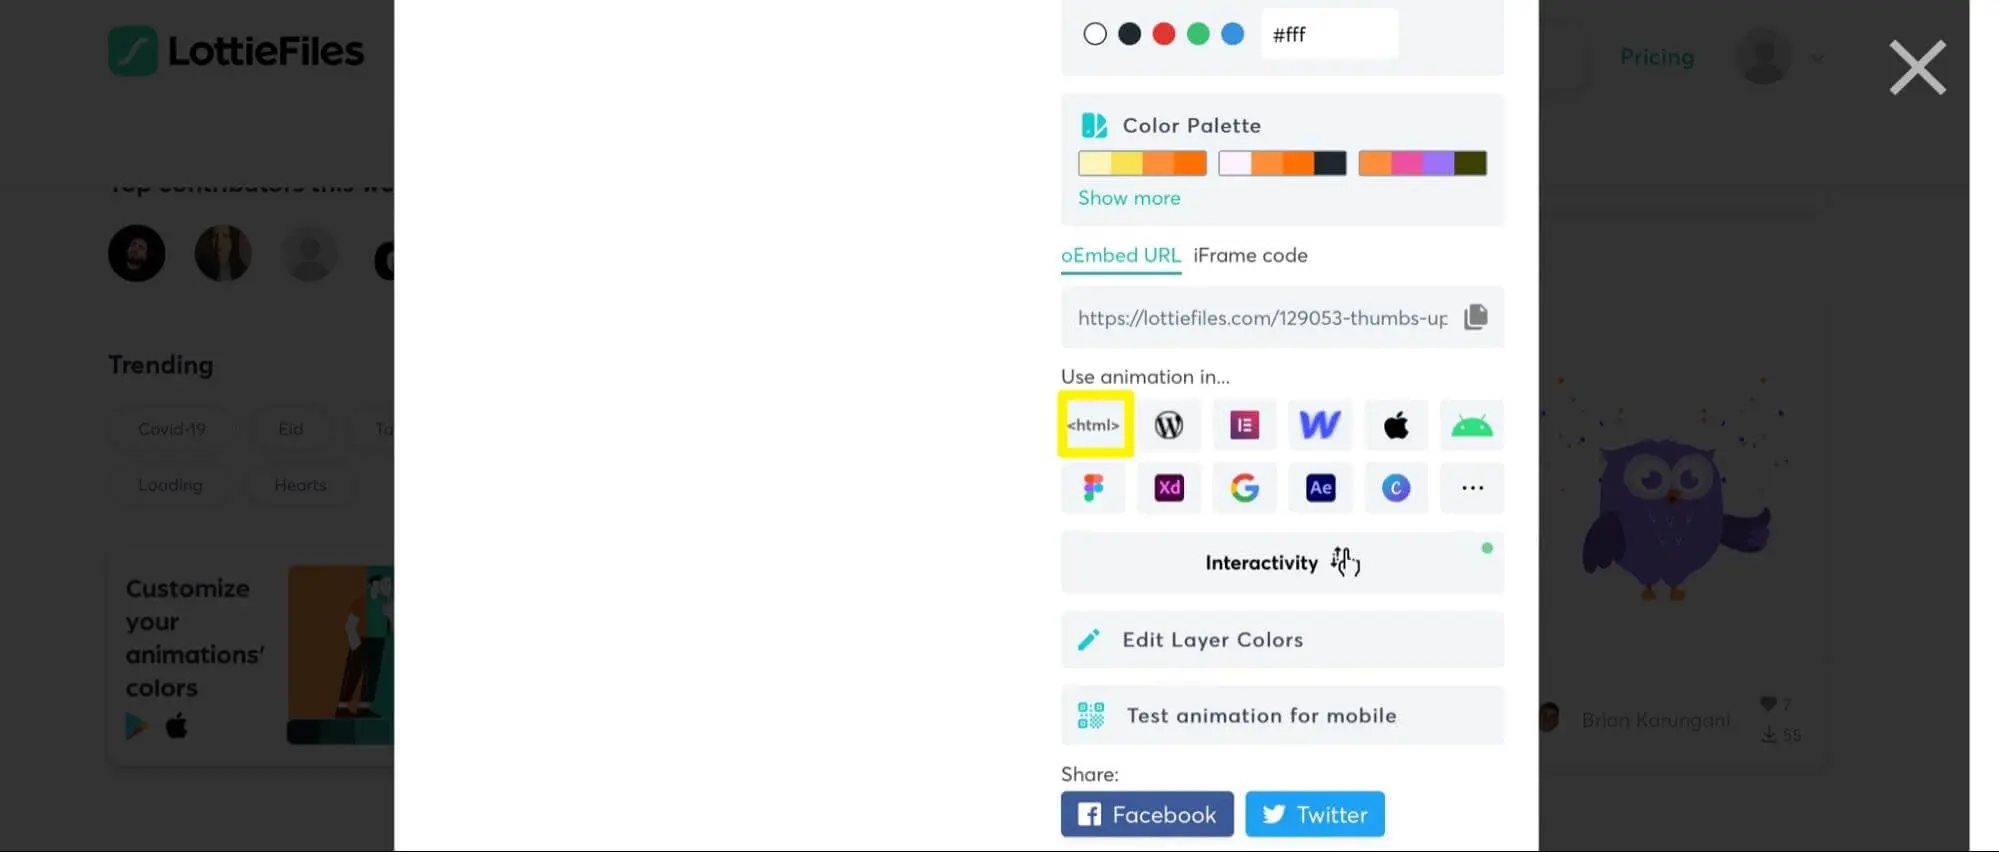
Next, scroll down until you see “Use animation in…” and select <html>:
This will take you to the LottieFiles Web Player:
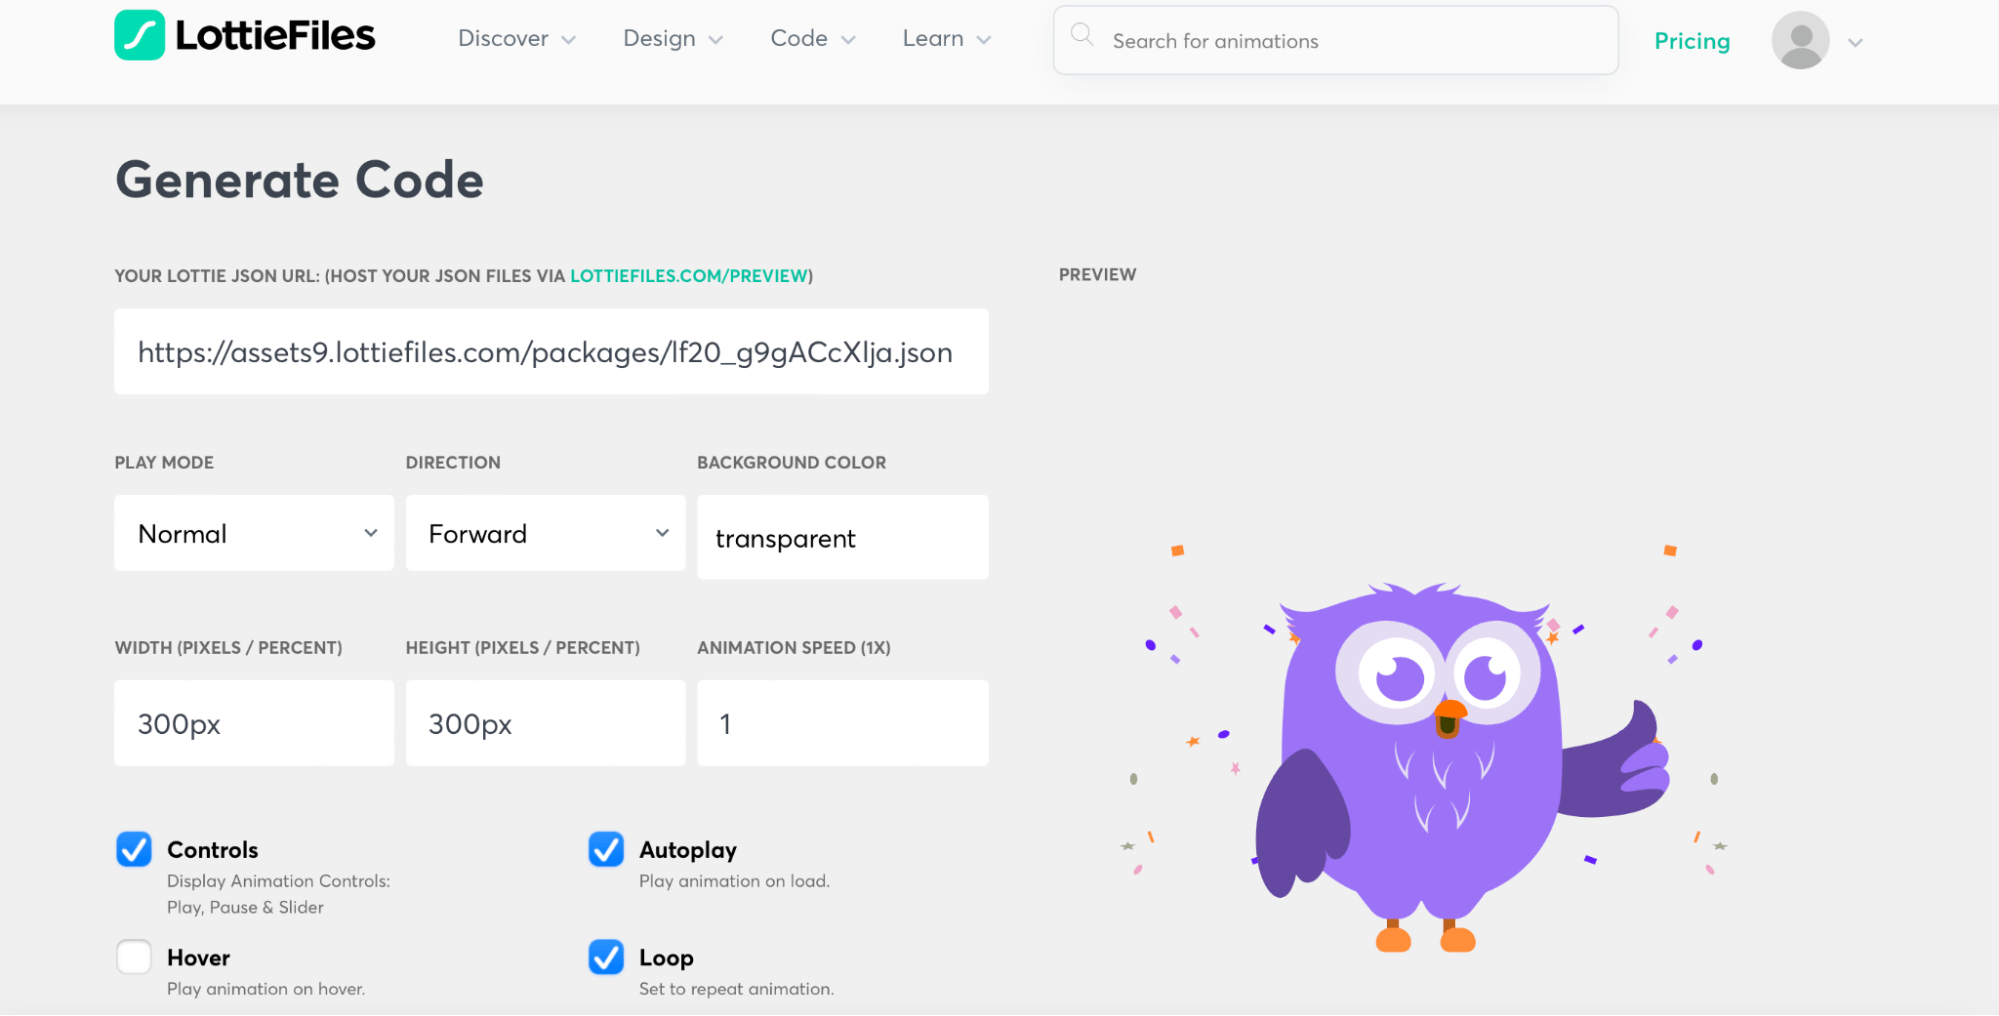
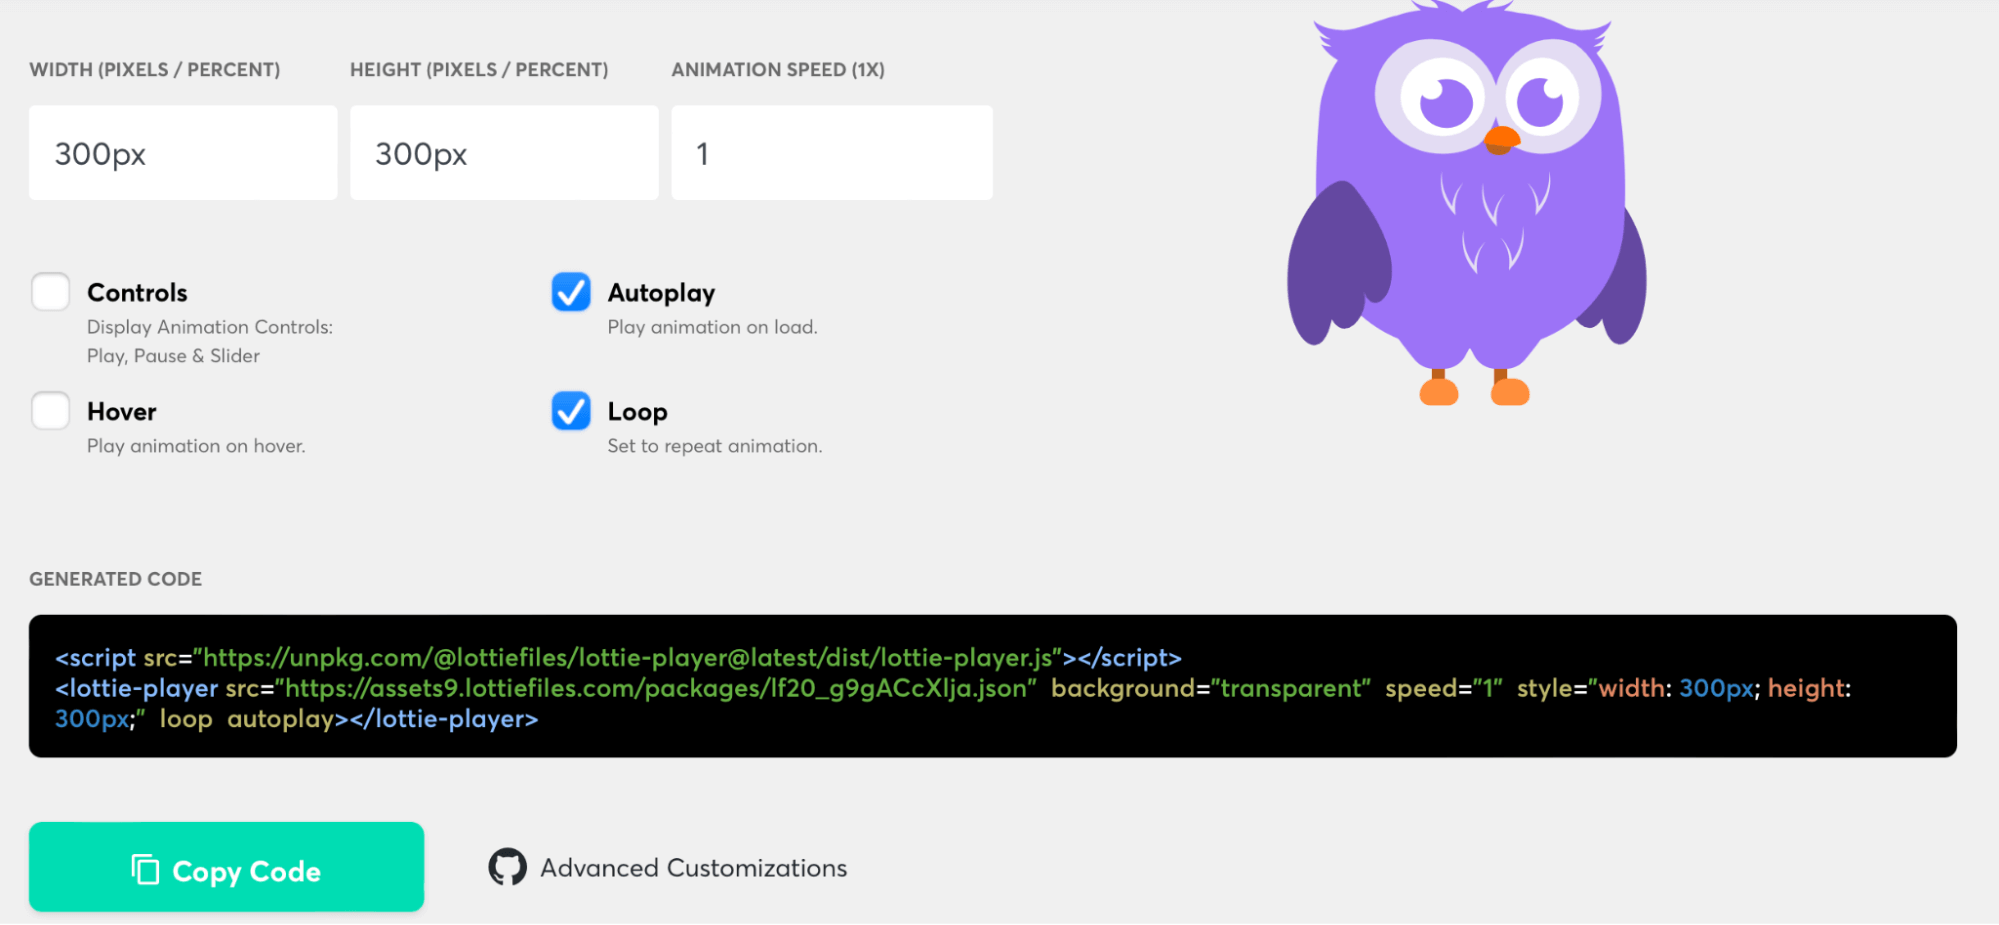
Here, you can choose a background color, determine the animation’s size and speed, and more.
Now, deselect the Controls checkbox and you’ll see that some HTML code has been generated at the bottom of the screen:
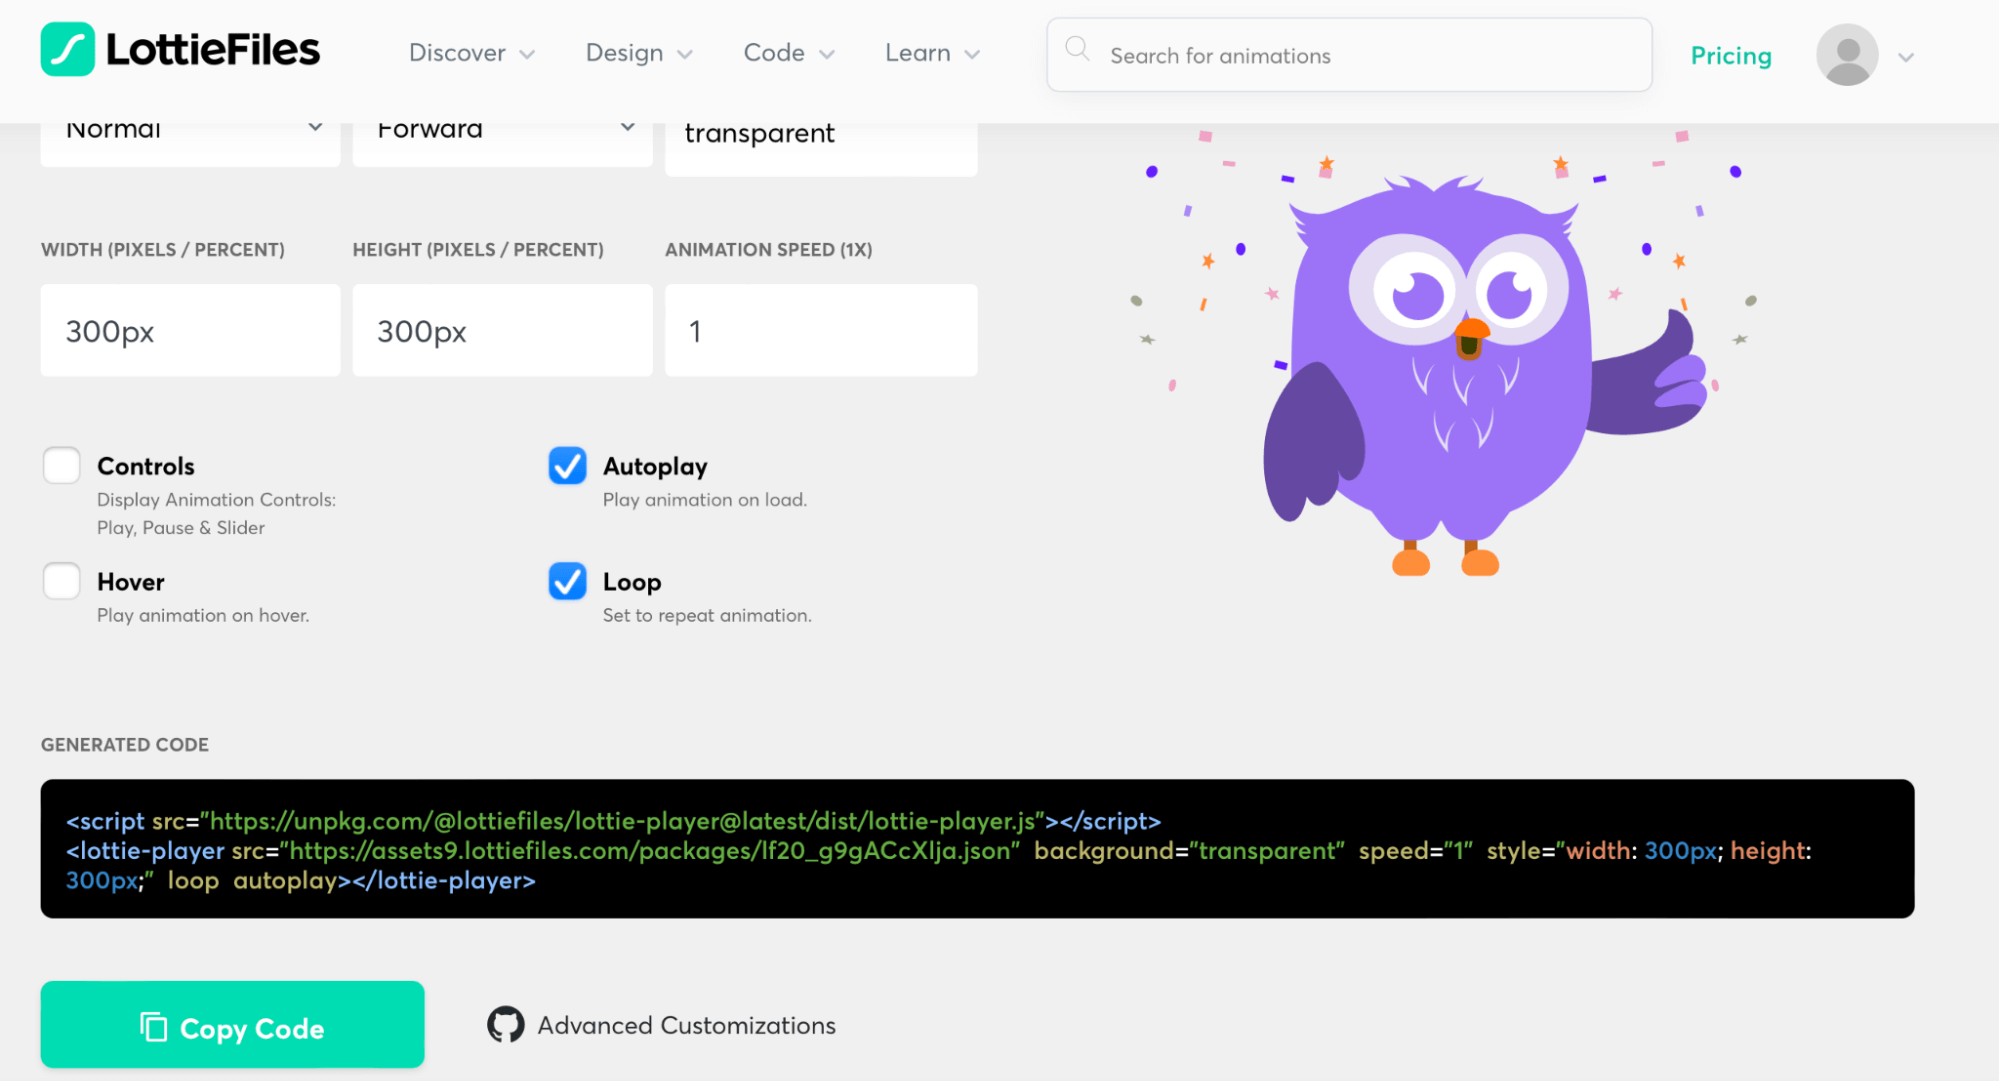
Copy the line of code that starts with “<lottie-player>” and ends with “</lottie-player>”. Then, in WordPress, add a new Custom HTML block:
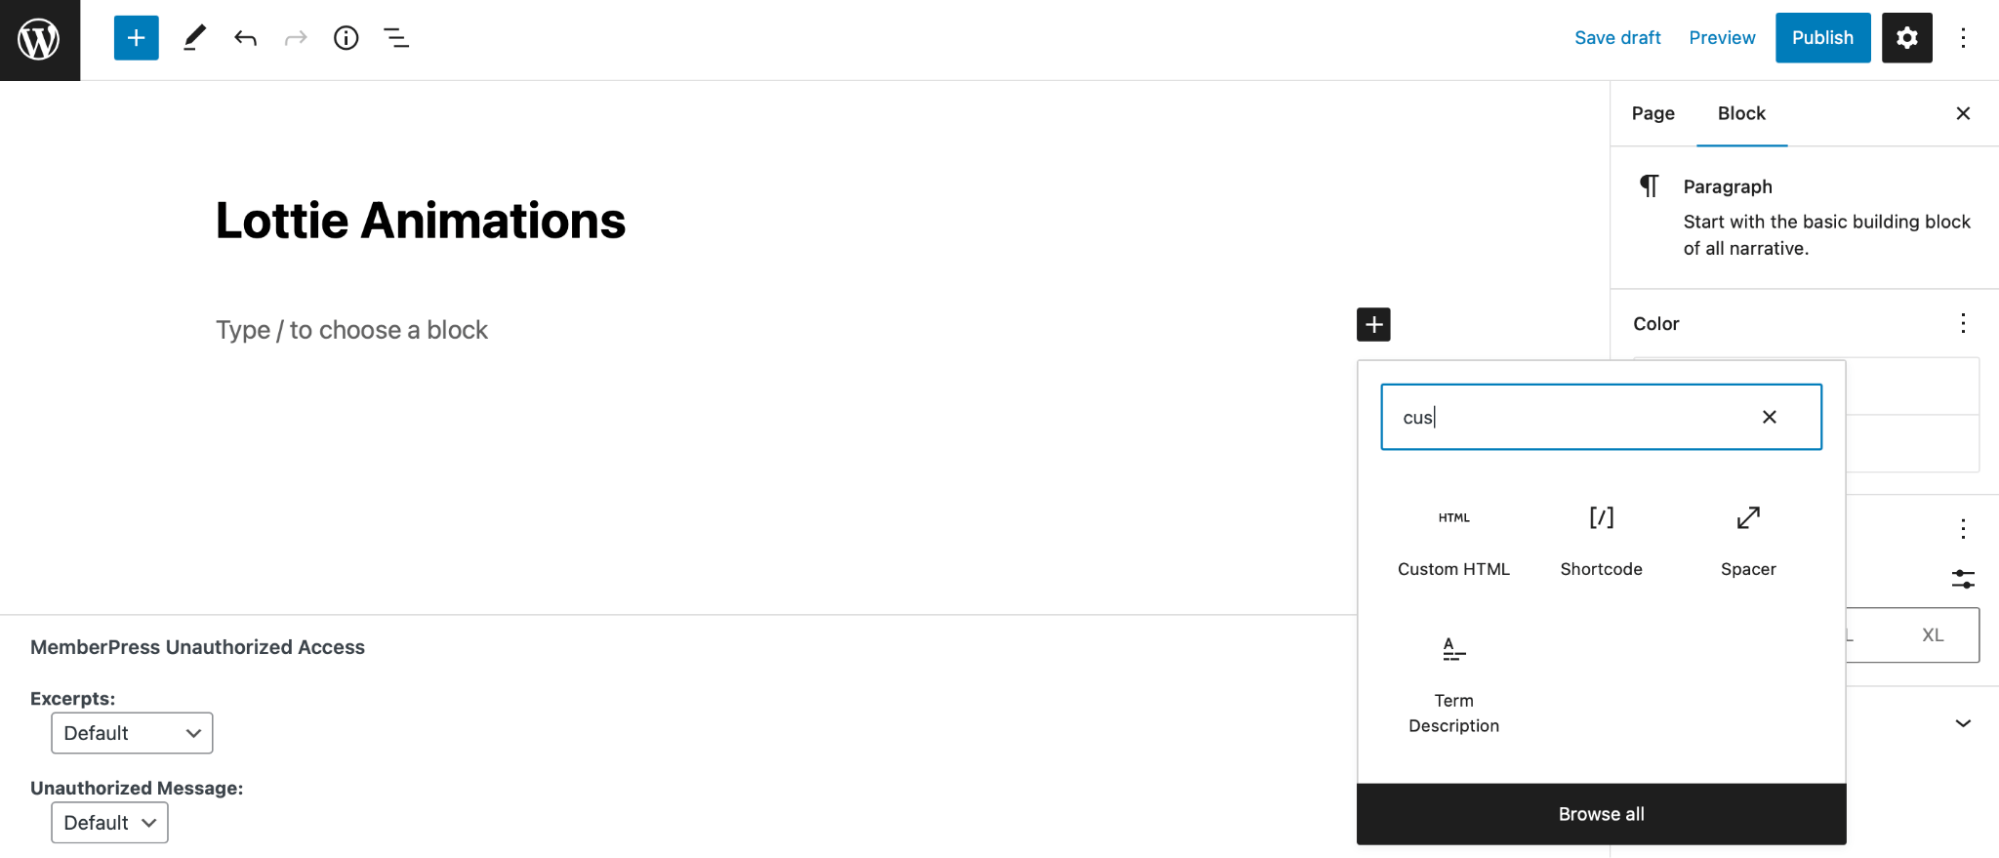
Paste the HTML that you copied from LottieFiles and click on Save Draft in the top right-hand corner:

Your animation won’t work just yet. First, you’ll need to load the Lottie Player JavaScript file in WordPress.
To do this, return to the LottieFiles Web Player and copy the script tag that begins with “<script>” and ends with “</script>”:
Now, head to WordPress and install the Simple Custom CSS and JS plugin:

Once active, go to the plugin’s dashboard and choose Add HTML Code:

You can give your code a title like “Adds Lottie Player”. Then, paste the script tag in the editor and click on Publish:

Now, return to the page where you inserted your HTML code. You should see your Lottie animation when you switch to the preview:
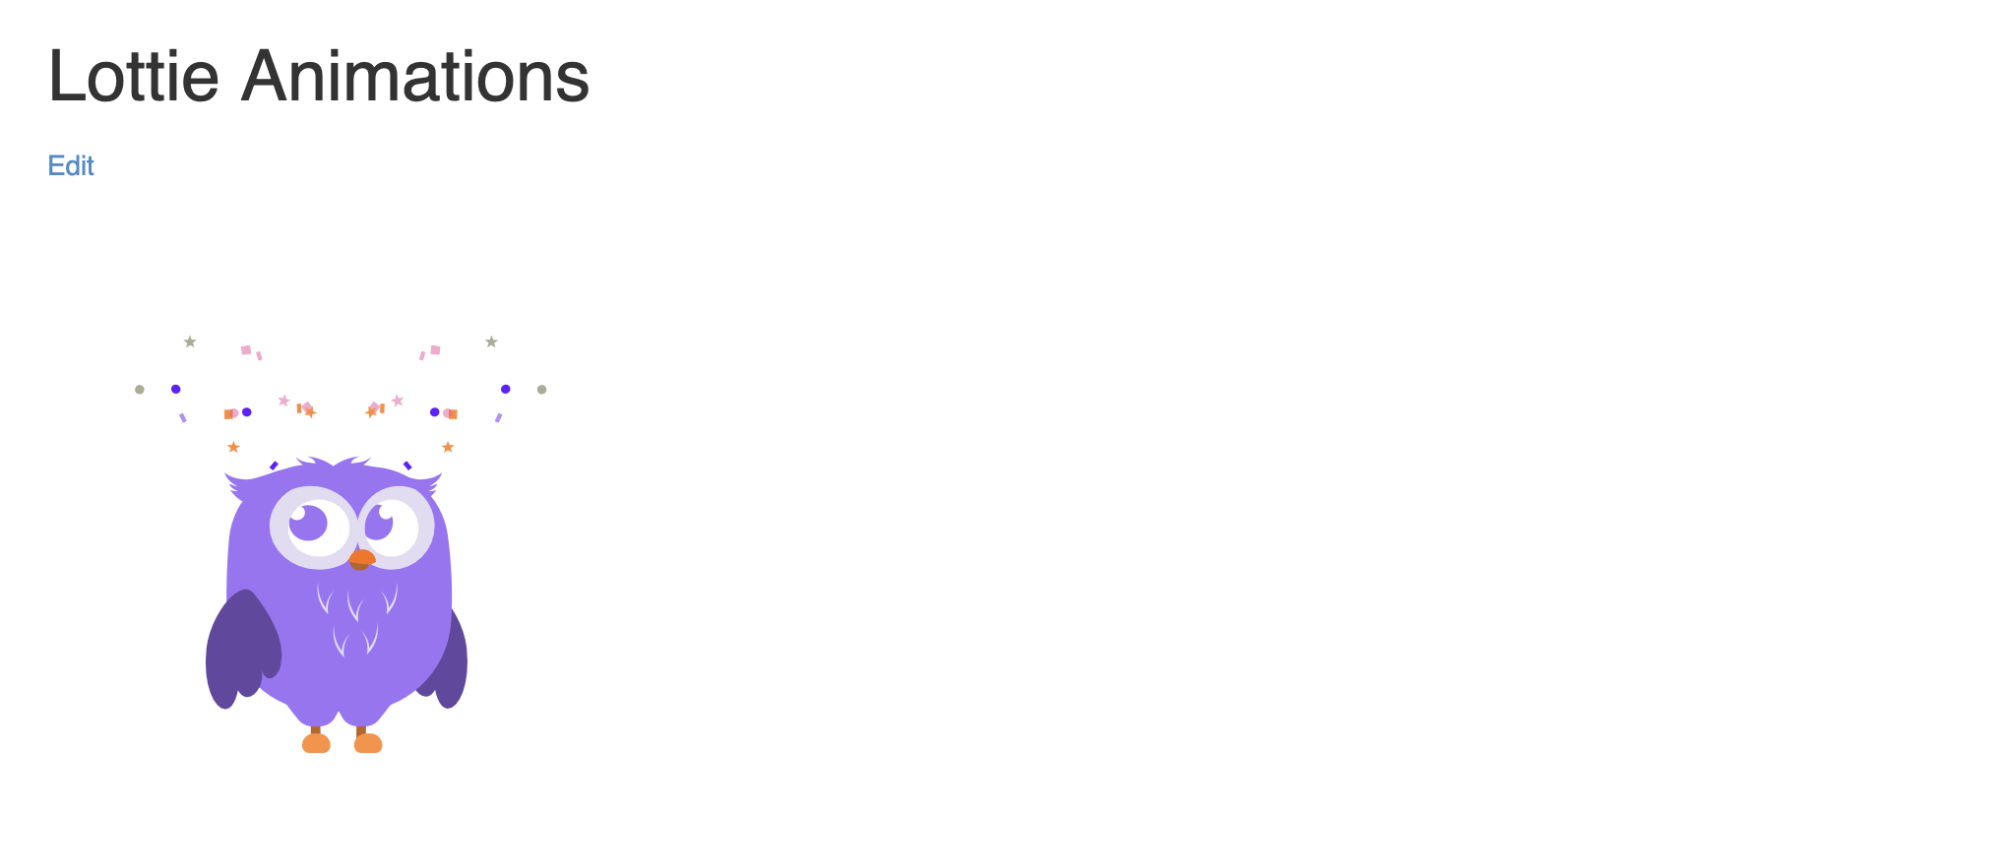
If the animation is too big or too small, you can change the default parameters in the HTML code where it says style= “width: X; height: X;”.
Add Lottie Animations to Your Site Today
Since images and videos appear on almost every website, including them on your pages isn’t likely to make your designs stand out. However, you can add Lottie animations to your site to impress visitors, reflect your branding, and improve engagement.
To recap, here are three ways to add Lottie animations to your site:
- Add Lottie animations with oEmbed.
- Add Lottie animations using the Lottie block for Gutenberg plugin.
- Add Lottie animations with HTML and JavaScript.
Another way to set your website apart from the rest is by designing custom pages that are unique to your brand. At DreamHost, we can build you a site that’s one-of-a-kind, mobile-friendly, and optimized for search engines. Check out our web design plans today!

Get a Beautiful Website You’re Proud Of
Our designers will create a gorgeous website from scratch to perfectly match your brand.
Learn More