Are you looking to unlock the full potential of your WordPress site?
WordPress novices and pros alike know there are so many opportunities for customization through the platform.
And many of these occasions live within your WordPress theme.
However, messing around inside a WordPress theme can have dire consequences for the unprepared.
That’s why we’re here to help you get prepared.
Keep reading for an in-depth explanation of WordPress’ theme editor and how to find your best theme, activate it on your website, and personalize it to fit your business and industry.
Note: There are differences between WordPress.com and WordPress.org sites! WordPress.com is an online website builder where you can create an affordable, less-customizable site. WordPress.org is free, open-source software where you can build a custom site that requires web hosting. In this article, we’ll focus on WordPress.org, but both platforms use themes and share many similarities.
Refresh: The Basics Of WordPress Themes
Before we dive into the details of editing your WordPress theme, let’s quickly refresh our knowledge of what a theme entails.
In WordPress, a theme is basically a group of files that all work together to control the appearance and functionality of a website. These files contain things like page templates, cascading style sheets (CSS), and more.
CSS
Cascading Style Sheets (CSS) is an essential coding language used for styling webpages. CSS helps you create beautiful pages by modifying the appearance of various elements, including font style, color, layout, and more.
Read MoreEvery site launched on WordPress comes with a theme. If you want to change the default, you can pick a WordPress theme from the platform’s official theme directory or a popular marketplace such as ThemeForest.
Or, of course, you can customize your theme using any of the processes we’ll discuss in this article, which will range from code-free to full-code tactics.
Theme Vs. Template
Themes are one of the coolest and most adaptable elements of WordPress.
Want to fundamentally change your website’s look and layout?
Just change the theme!
Switching out your theme isn’t hard, thanks to how easy WordPress has made it to find, install, activate, and even edit most themes. With thousands of free options in the WordPress theme directory and thousands more offered by third parties, most people can find a theme that fits their industry, functionality needs, and technical savvy.
However, there is something most themes can’t help you with — and that’s making different pages totally unique from each other.
Say you want different pages to have very different layouts. Or, you want similar design elements on different pages but want the content inside them to be unique. Since themes apply styling to the entire website, this is harder to change via your theme.
That’s where templates come into play.
Templates aren’t unlike themes; they just focus on the features of individual pages or types of pages versus the overall site.
Most themes will come with some predetermined templates for controlling your pages, but you can edit and create your own as well. However, this process can be even more complex than working with themes, so if you’re interested in customizing templates, we strongly recommend reading Decoding WordPress: Custom Templates and Template Parts.
What Is The WordPress Theme Editor?
This section starts with a bit of clarification.
For a long time, Theme Editor was the name for the text editor inside the WordPress admin dashboard, enabling users to edit code within the theme’s files.
That’s still there and will be the focus of much of this article. However, today, it’s technically called Theme File Editor. So, if your WordPress instance is up to date — which it should be for security purposes! — you’ll be working with “Theme File Editor” instead of “Theme Editor.” You’ll notice we still use the older term most of the time because so many people are familiar with it.
We should warn that working in the theme editor should be done with extreme caution. Changes will be lost if your theme is updated or changed. It’s also quite easy to break your website design and functionality — and, worst case, you could even lock yourself out of your site!
If you don’t have a lot of experience with WordPress or coding, we recommend starting with the beginner and no-code editing tactic, and only getting more technical when things start to feel familiar.
Theme Editor
The WordPress theme editor is a text editor that enables you to edit a theme’s files directly from the admin dashboard. You can use the editor to upload new files and remove any unwanted ones.
Read MoreWhy Use The WordPress Theme Editor?
So why do people jump into the WordPress theme editor knowing it’s so sensitive? Because it’s the best way to get at all the files that make up your WordPress theme.
Most design elements will fall into three files: style.css, functions.php, and templates.
While some themes will have more files containing design features, let’s first discuss the core pieces you can access via the theme editor.
Style.css File (aka Stylesheet)
Most of the design-related elements of a theme — typography, colors, layouts — live in the style.css file, also commonly called the stylesheet.
Modifying, removing, or adding CSS code in this file is an impactful way to alter your website’s style.
Functions.php File
Functions.php is where the code for your theme’s functions and features resides, written in PHP of course.
Again, with extreme caution, code can be edited here to add things to your website header and footer, change navigation menus, update post formatting, etc.
Templates File
Your templates file houses either PHP files or HTML files (depending on the theme) that make up the layout of your website’s pages.
If you want to change how certain pages or page types (think post pages, archive pages, etc.) look, you would make the edits in the template files.
How To Use WordPress Theme Editor
Now, for the main event!
Keep reading to learn everything you should know when picking out, installing, and custom tailoring your WordPress theme.
Choose Your Theme
To shop from WordPress’ theme directory, sign into your WordPress.org website, visit Dashboard, and navigate to Appearance > Themes.
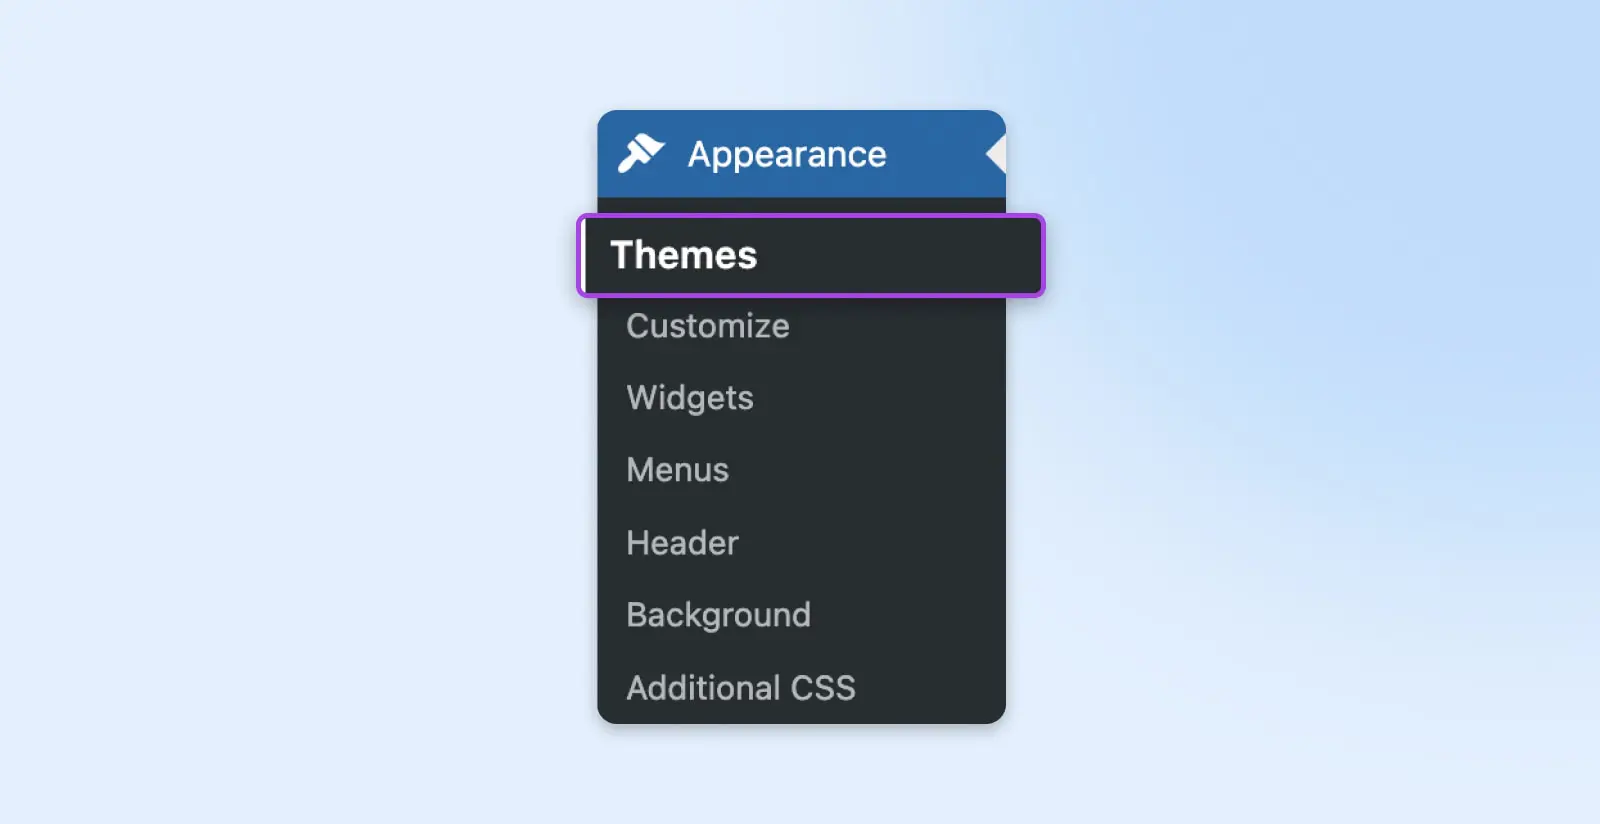
Use the Add New button at the top of the page next to the Themes page title or the Add New Theme plus button to pull up your options.
You can scroll through all the themes on offer or use the feature filter and search bar to narrow down the options.
Click on a theme or hover over it and use the Preview button to learn more about the theme, which may include a description, a demo of what it looks like, and sometimes reviews.
If none of the options match what you’re looking for, you can also visit third-party theme builders and marketplaces like the aforementioned ThemeForest, StudioPress, or Elegant Themes.
Trying to find the same theme featured on a website you love? A resource like WordPress Theme Detector can help with that.
Install And Activate Your Theme
If you’ve chosen a theme you like from inside the WordPress directory, you’ll see an Install button when you click on or hover over it. This theme will be added to your Themes page in a single click.
To use it on your website, go back to the main Themes page (Appearance > Themes) and click Activate to apply it to your website.
And if you choose a theme from another source, it’s still easy to use in WordPress.
On the main Themes page again, use the Add New button at the top of the page next to the Themes title.
On the next page, you’ll see a button in the same place called Upload Theme.

Once you click this, you’ll see where to upload the .zip file you received from the third-party source. Choose Install Now to upload it to your Themes page. From there, you can activate it just like any other theme.
Customize Your Theme
This is your second reminder that making edits directly to your theme can harm your website.
Another option to consider if you want to add functionality or change the appearance of your current theme — plugins! (And widgets!)
WordPress plugins and widgets are tools that extend functionality and update style without making any code edits. Plus, they’re simple to use and very often free! Plugins and widgets can be used to improve site SEO (Yoast), install e-commerce features (WooCommerce), and much more.
If you’re scared to edit theme code or want your upgrades to last even if you switch or update your theme — try plugins and widgets.
If you can’t find any extensions that do what you want and still decide to edit your theme, be sure to back up WordPress.
For extra safety, you can do one more thing to protect your site in case theme editing goes badly and to hold onto your edits throughout theme updates: Install a WordPress child theme.
A WordPress child theme will work exactly like the “normal” theme from which it’s derived — its parent theme. Editing the child theme enables your customizations to live through updates.
With those warnings out of the way, it’s time to customize!
Built-In Theme Editing Tools (First-Timer Friendly)
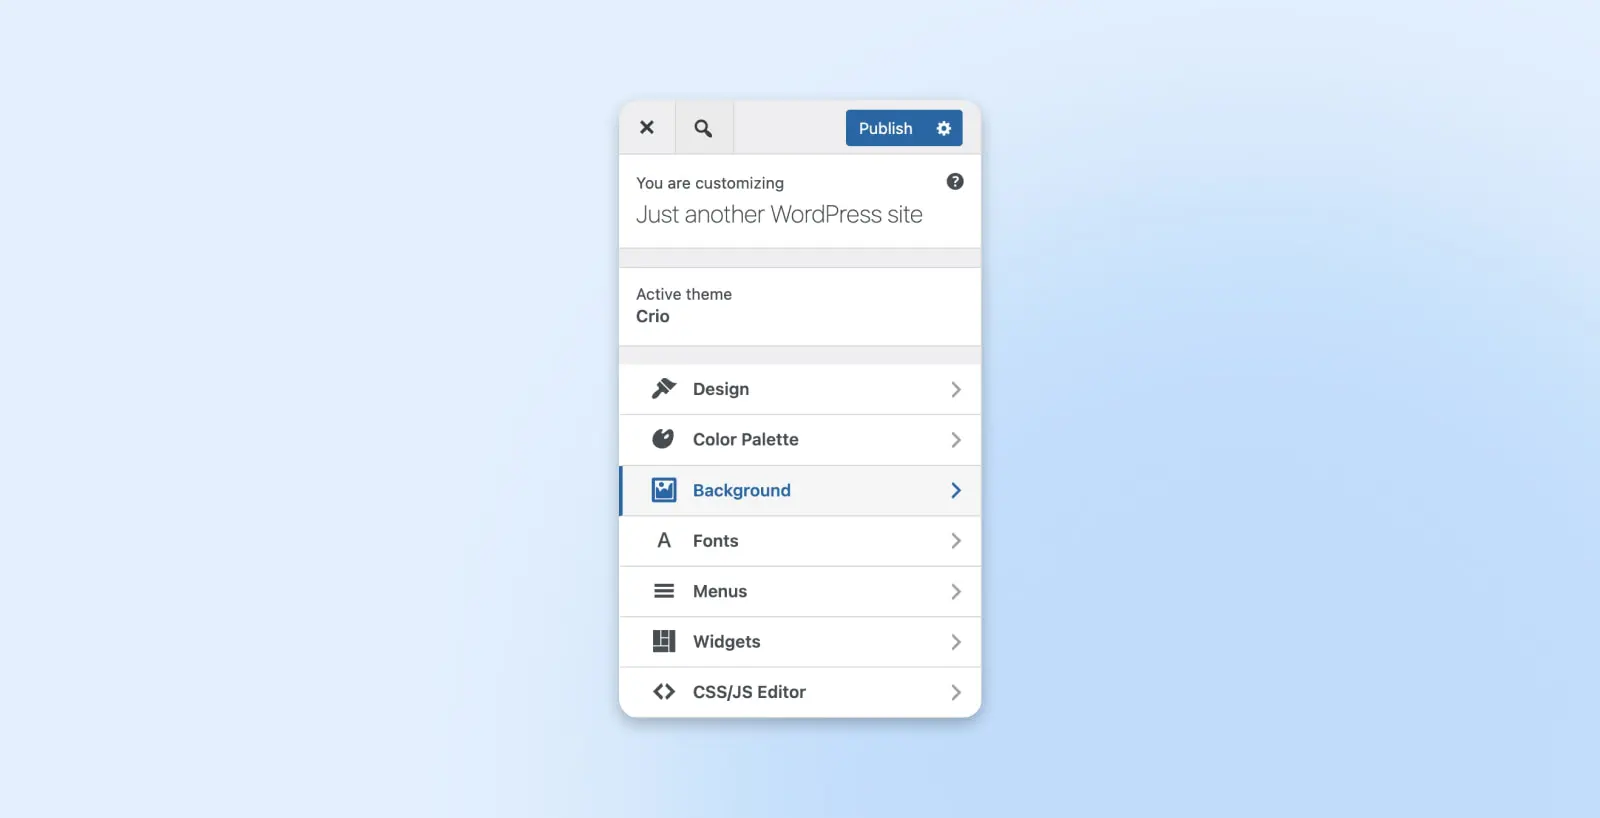
If you look under the Appearance tab again in Dashboard, you should see either Editor or Customize.
For the most part, Customize is a tool that will help you edit non-block themes, while Editor (which has several names: Site Editor, Block Editor, etc.) is built for block-based themes.
Whichever your theme has, both platforms are highly visual, user-friendly, and feature robust instructions for switching up various site elements.
Customize has more limited options for changing your design, color palette, fonts, etc. The customization options will vary by theme.
However, you can also add custom CSS and/or JavaScript through Customize. Just be sure to hit Publish to apply any updates made.
With the Editor tool for block-based themes, you can get deep into customizing pages, templates, styling, etc. Again, options will vary somewhat by theme.
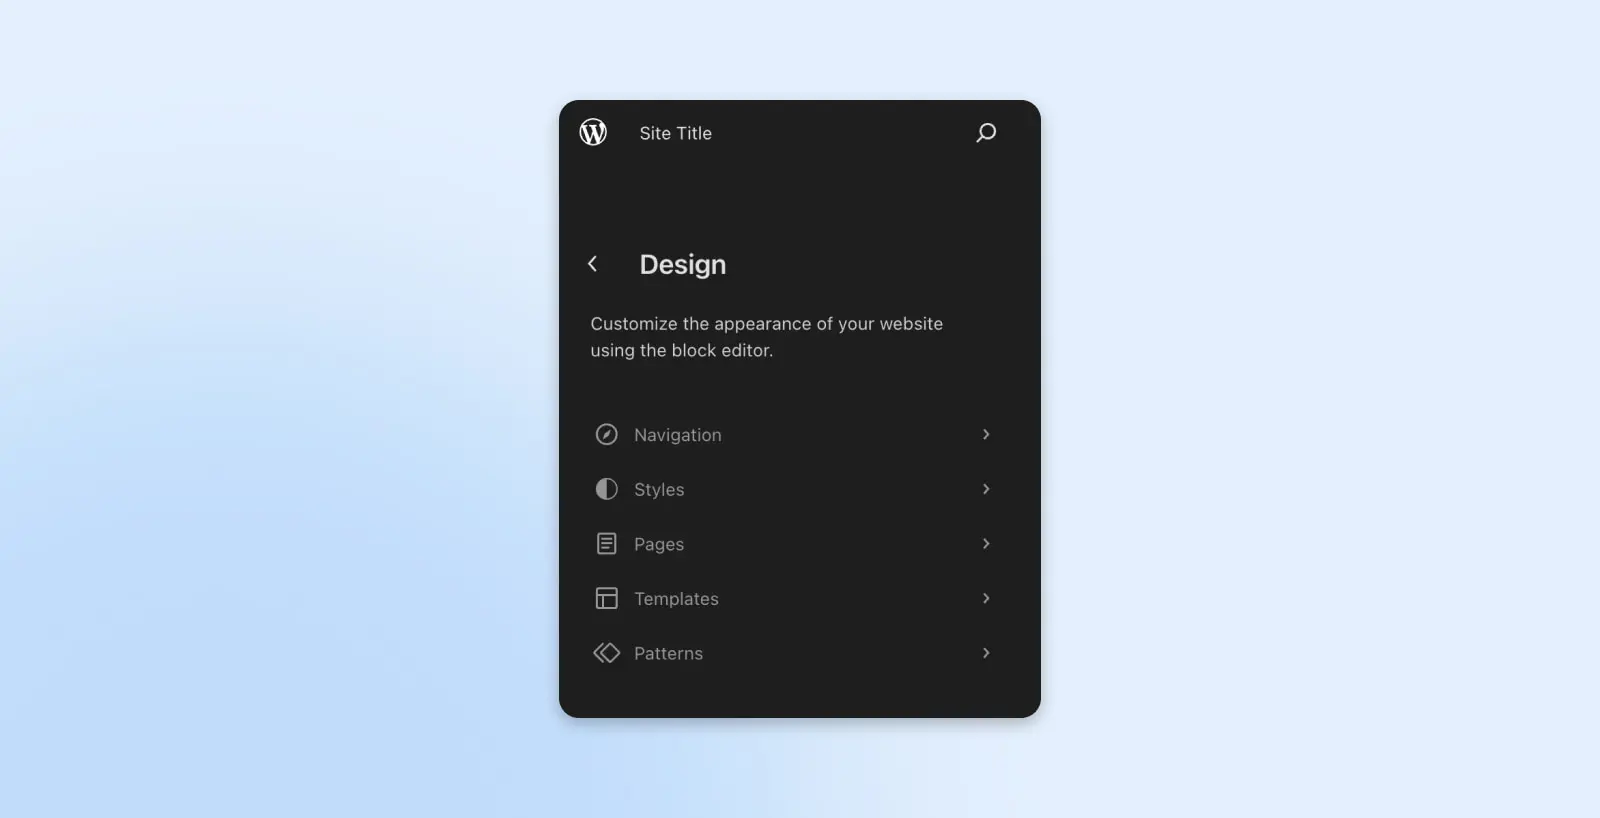
For most elements within Editor, you can edit the code directly.
For example, if we select Styles and click on the page to begin editing, a panel full of options appears on the right side of the screen.
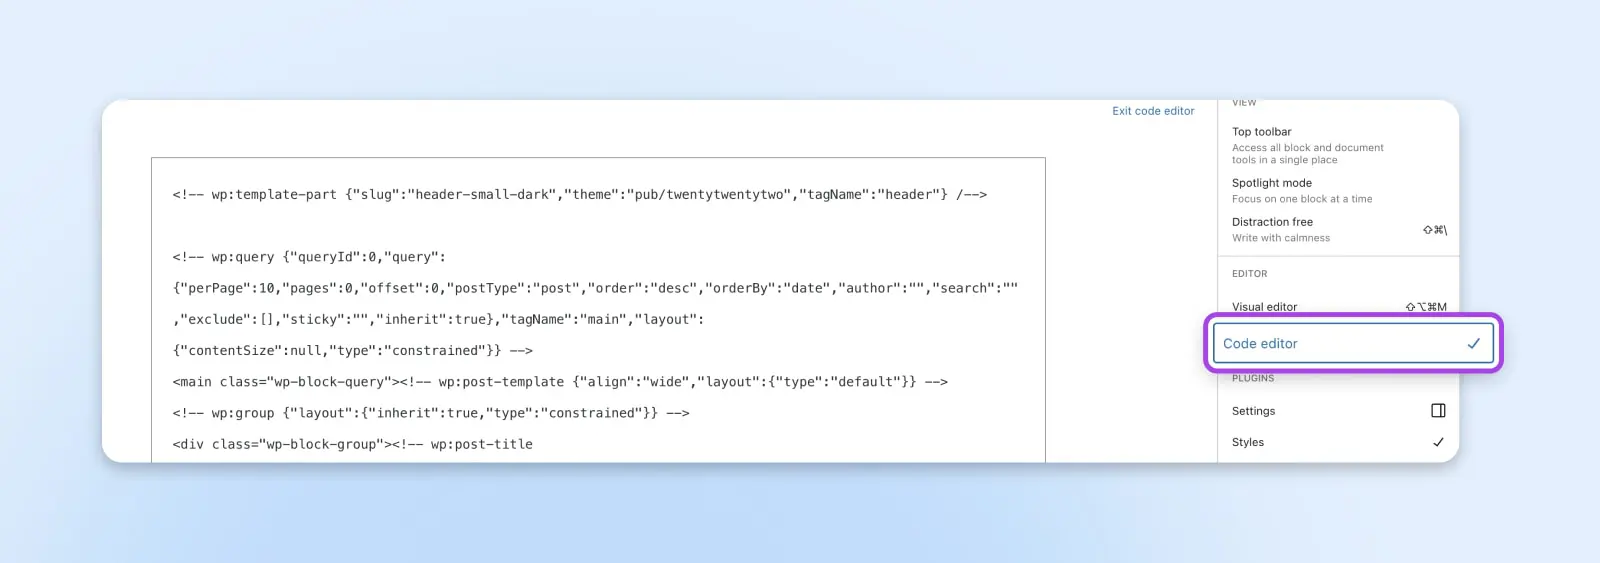
A toolbar should also open up at the very top of the page. Use the three-dot menu to open a list of choices, including one to switch from Visual editor to Code editor.
This is where you can work within the code. Use the Save button to apply changes to your theme and site.
There’s lots to learn when it comes to this somewhat new way of editing WordPress themes. For more information, check out What Is WordPress Full-Site Editing? And How Will It Affect Your Site?
Host File Manager (Coding Required)
Now we’re moving into coding territory.
For most hosted WordPress sites, you can access and edit the files making up your theme via your host’s file manager.
This file manager will look different for every host, but we can explain how it works within DreamPress.
Once you log in, go to WordPress > Managed WordPress in the sidebar.
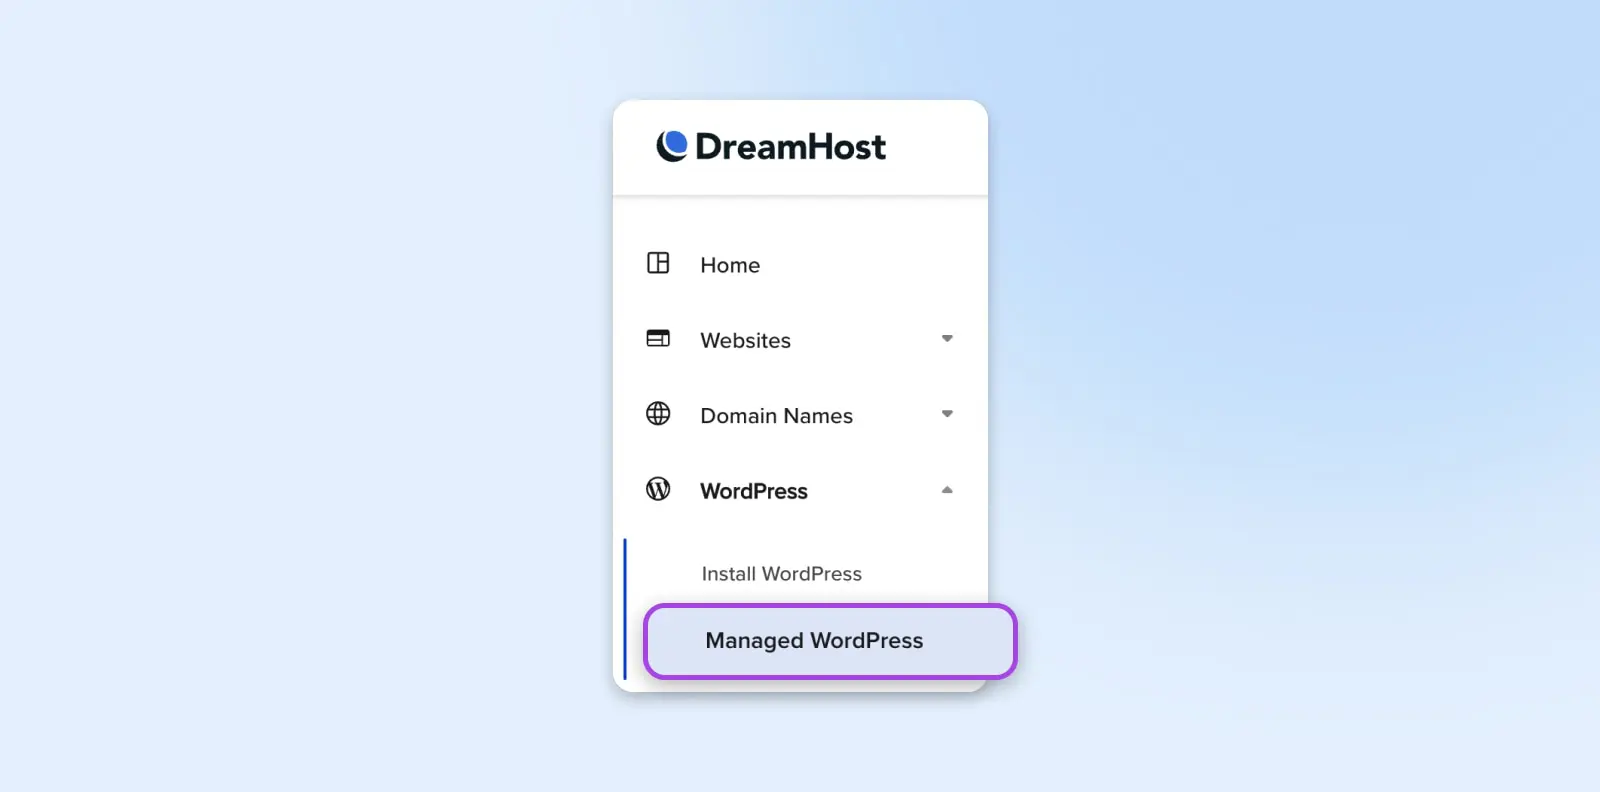
Find the website you want to edit and choose Manage.
You should land on the Details page for that website. In the File Upload section, select Manage Files.
Open the folder that has the domain name of your website on it. From there, you can navigate to wp-content > themes. Click on the folder for your current WordPress theme, or whatever other theme you want to edit.
Just like that, you’re looking at all the files where you can make changes to update your theme.
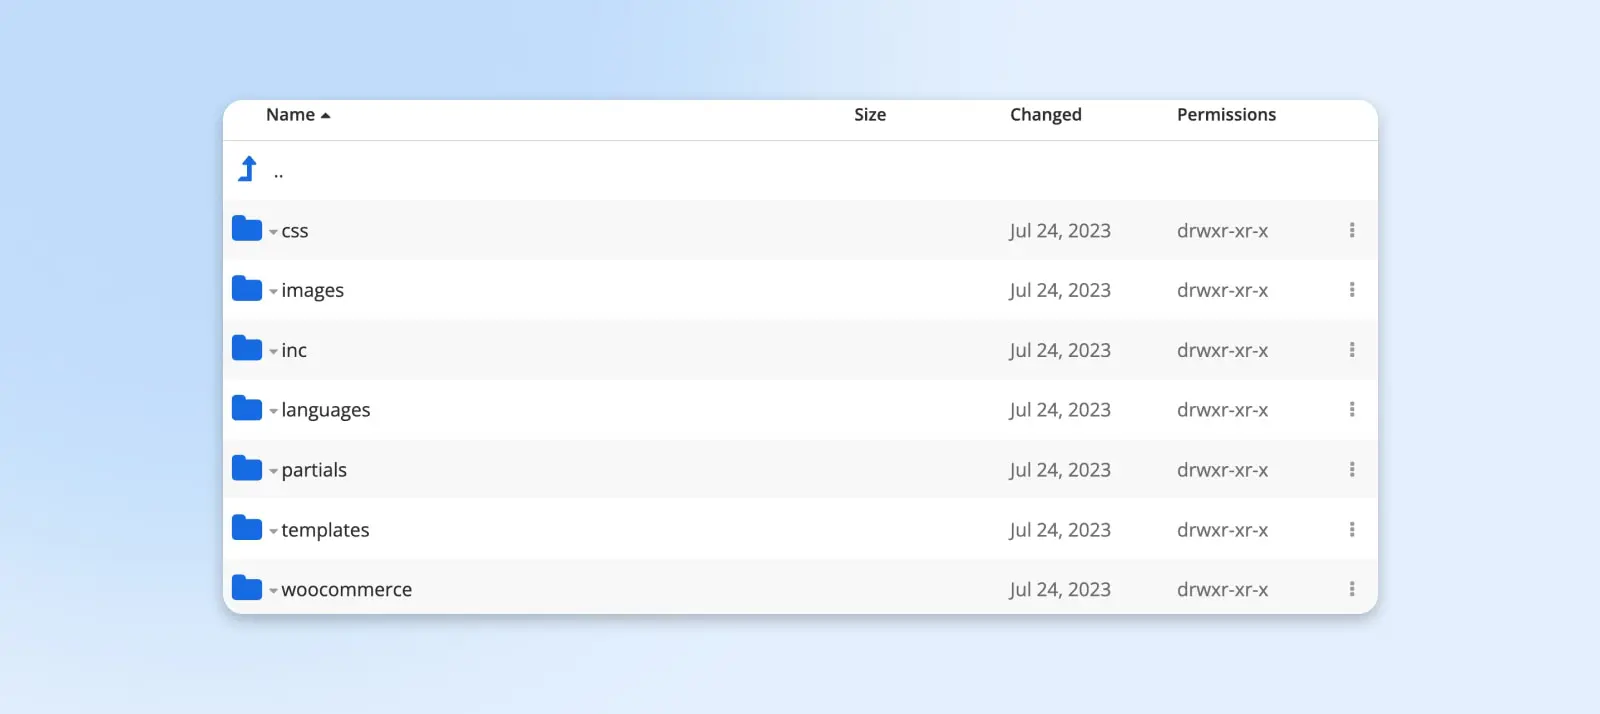
Be sure to save any changes you make inside the file editor.
WordPress Theme File Editor (Most Advanced)
More coding ahead!
To edit your theme from within WordPress, go again to Dashboard and navigate to Appearance > Theme File Editor (this is what used to be called “Theme File Editor”).
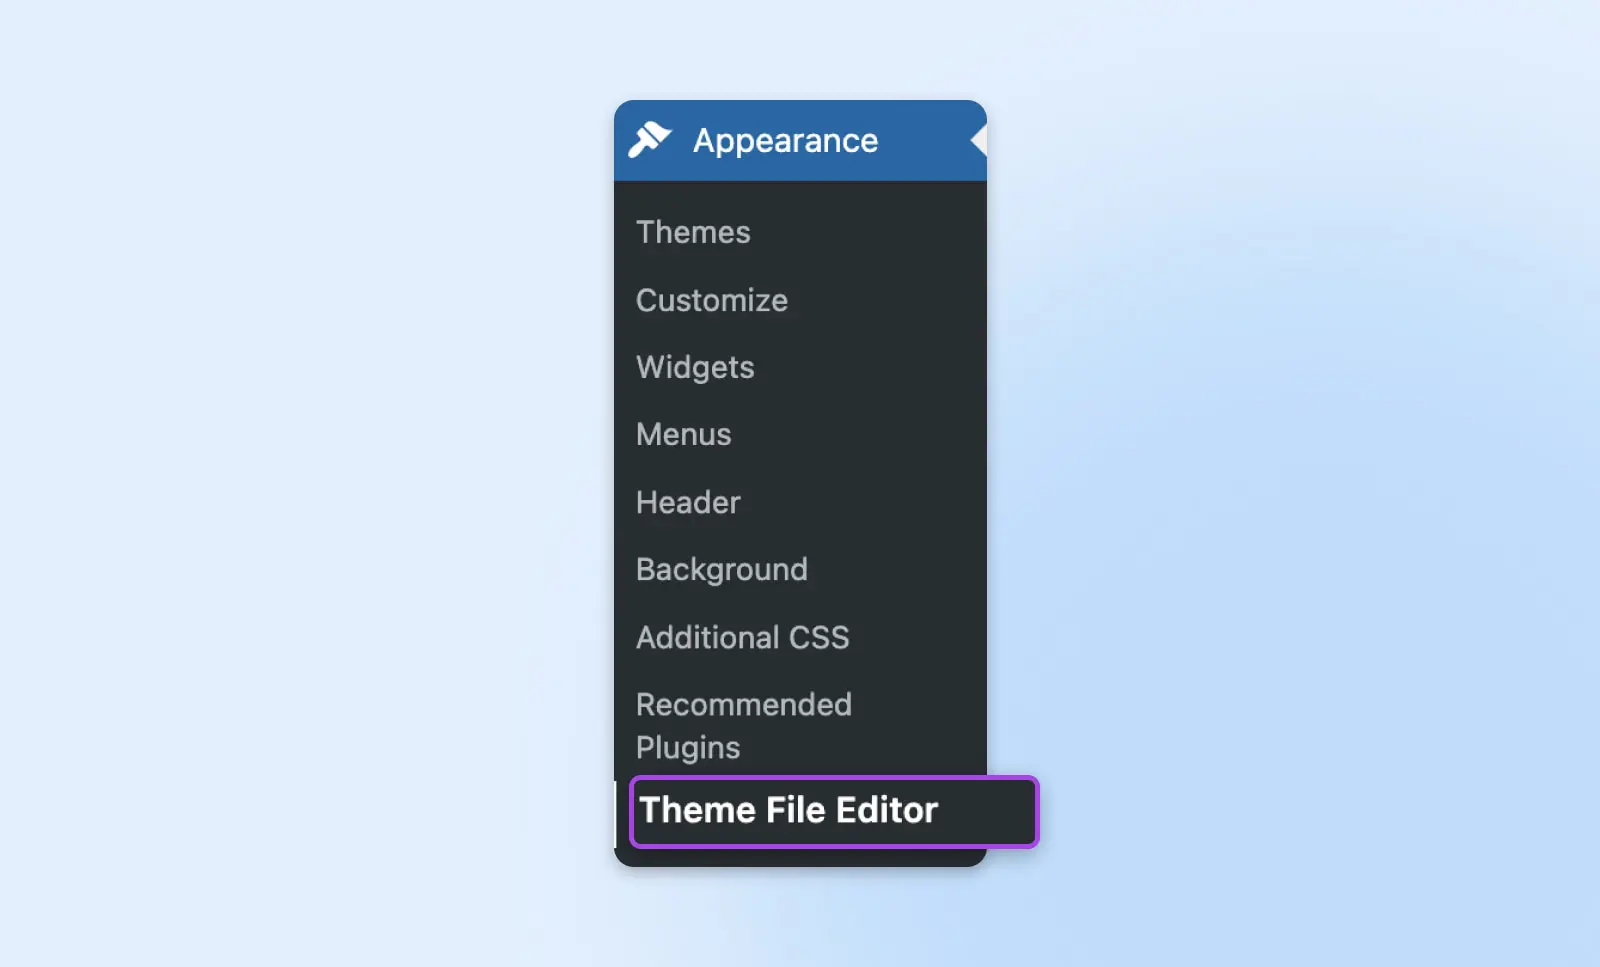
The text editor should pop open; on the right side, you should see a list of theme files. Click into these files to make your changes.
Use the Update File button after you have completed your updates. If there are syntax mistakes in the code, WordPress will prevent you from saving your changes and highlight the error so you can fix it more readily.
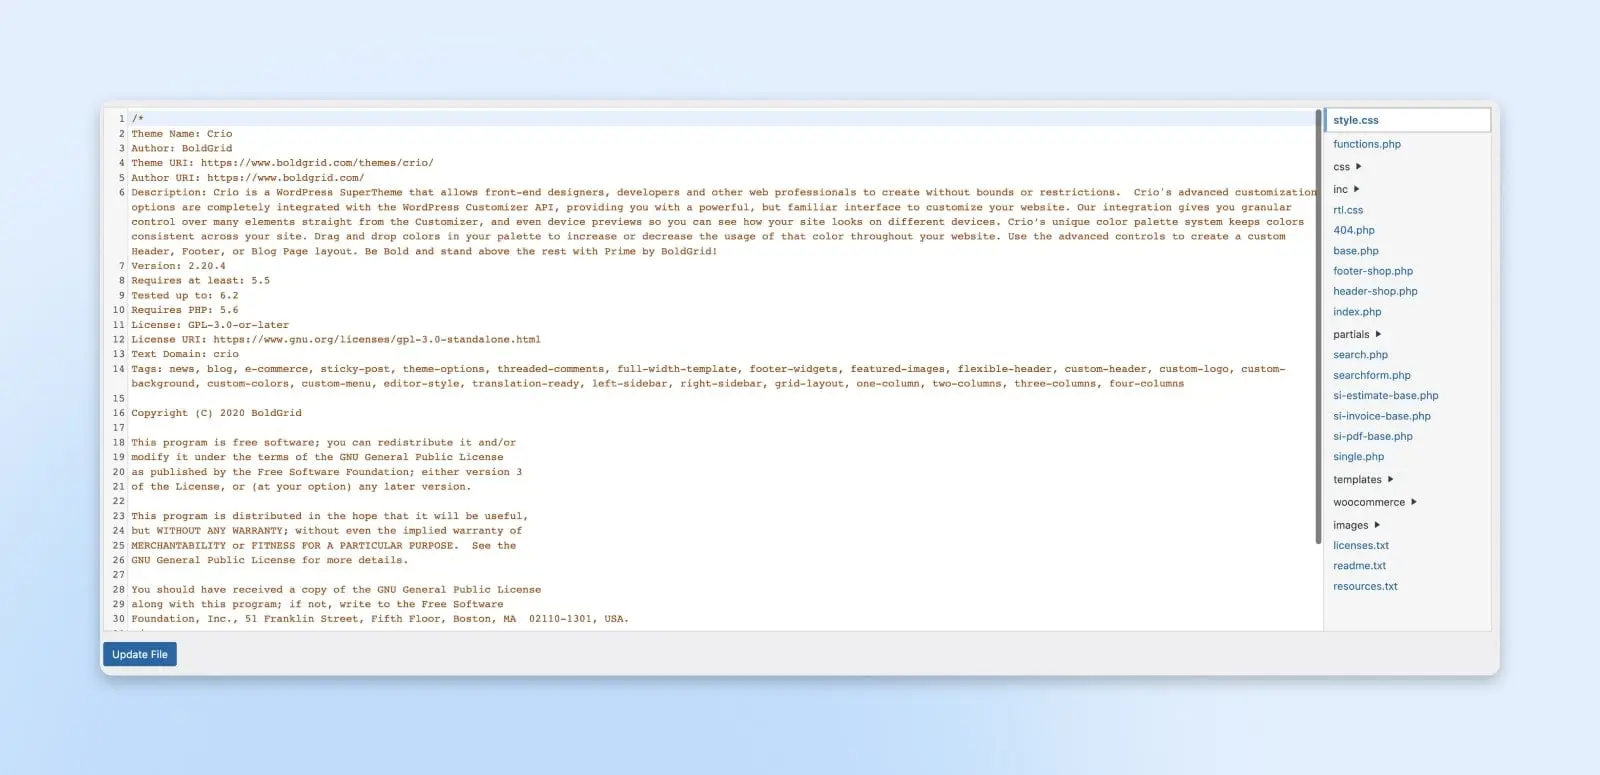
If you want to edit a theme you aren’t using, there’s a drop-down menu above the text editor where you can select which theme you want to edit.

Remember that choosing a different theme here won’t automatically switch which theme your WordPress website is using.
To do that, go to Appearance > Themes once again to activate a different theme. This is also where you can check whether your themes need updating. It’s important to keep them up to date to install any new security patches the theme developer has rolled out.
Honorable Mention: Page Builder Plugin (No Code)
Page builder plugins typically feature easy-to-use drag-and-drop editors to design website pages — not themes. This is why we’ve classified them as honorable mentions. Elementor and WPBakery are popular examples of page builder plugins.
Where Elementor can be used as a website builder solo, as a WordPress plugin, it can only be used as a page editor.
Technicalities aside, you can still use Elementor to create and edit pages that look exactly how you want — no theme editing required.
To use this plugin, find your way to Plugins > Add New and search “Elementor.”

Use the Install Now button, then click Activate to turn on Elementor in the sidebar of your WordPress dashboard.
We recommend following Elementor’s step-by-step “Getting Started” guide to learn the ins and outs of this tool, as it’s impressively powerful. Once you know the basics, you can use the Elementor plugin to design beautiful individual posts and pages.
While Elementor isn’t a theme editing tool in the traditional sense, it can still be incredibly beneficial for anyone who wants to customize their website without coding.
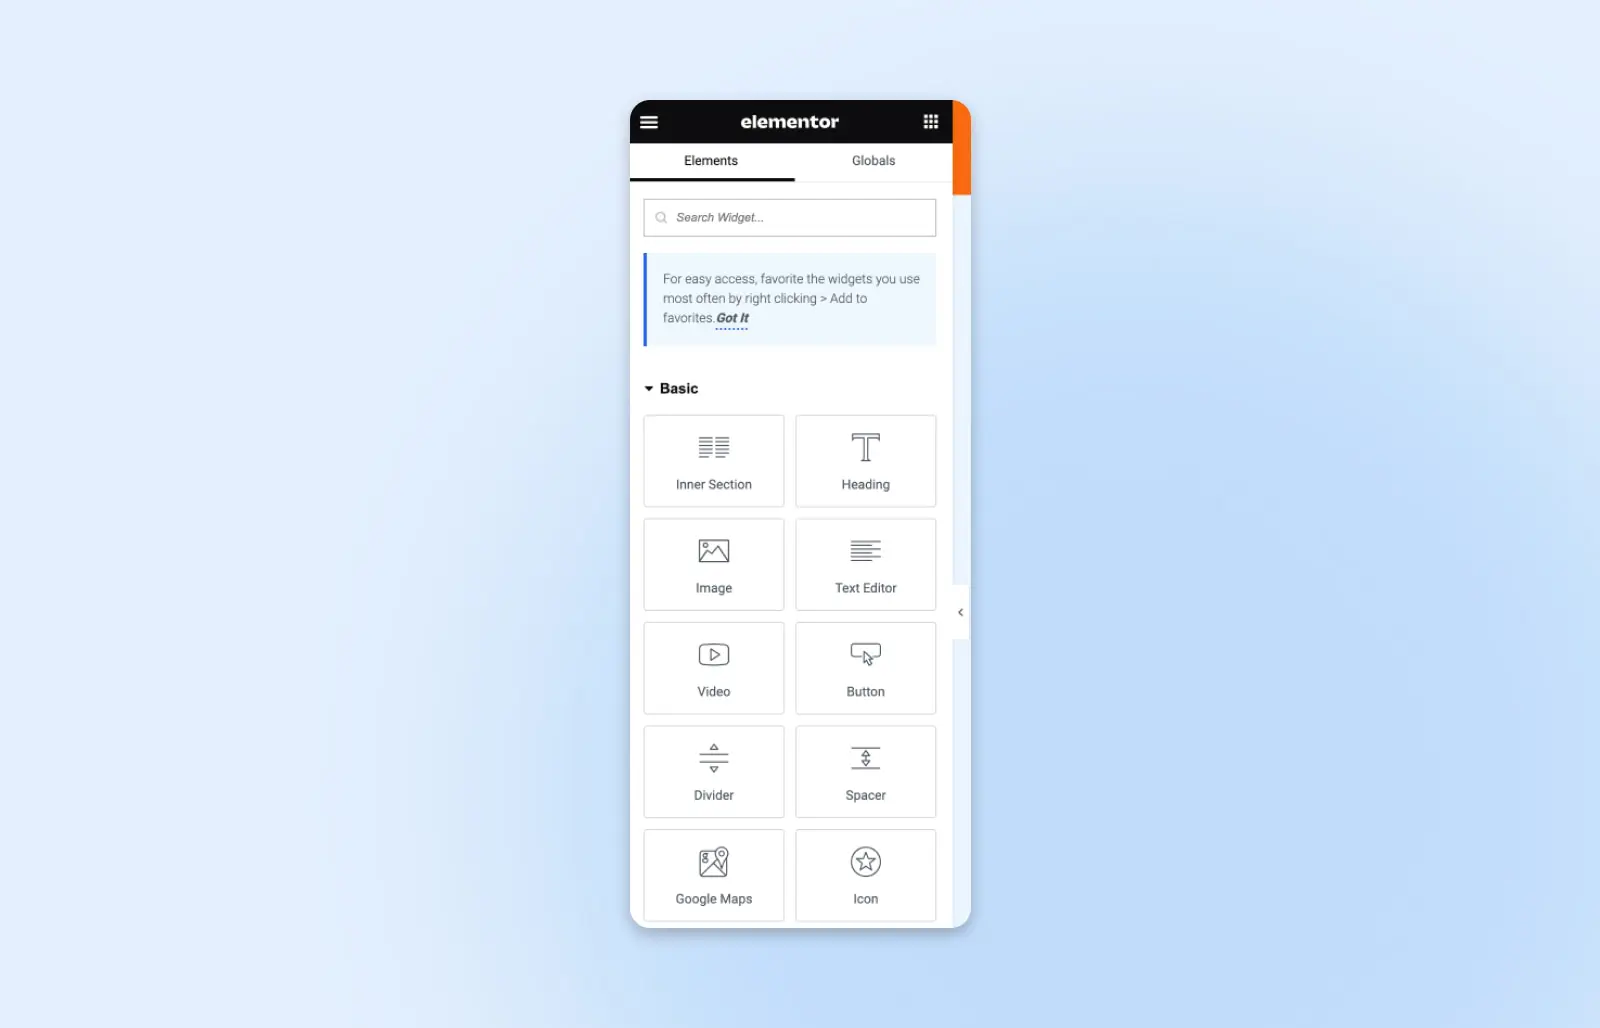
And if you choose to pay for Elementor Pro, you can actually design your theme within Elementor Theme Builder.
Can We Help You Decode WordPress?
The intricacies of WordPress are practically endless — but that doesn’t mean you can’t take full advantage of the software with the right guidance.
Stay tuned to the DreamHost blog for all the latest WordPress news and learn how our WordPress Hosting and Pro Services can help you make the most of your site.

WordPress + DreamHost
Our automatic updates and strong security defenses take server management off your hands so you can focus on creating a great website.
Check Out Plans