WordPress is a powerful, flexible Content Management System (CMS) that can be an excellent solution for collaboration. However, to make the most of the CMS, it’s important to understand how to navigate and leverage its user roles and permissions features.
WordPress user roles let you assign certain levels of access to people who are registered to your website. This can help you manage and control what tasks are possible and can ultimately help strengthen your site’s security and performance.
In this post, we’ll explain what WordPress user roles and permissions are. Then, we’ll provide you with advice for assigning them and cover some helpful troubleshooting tips and useful plugins to help you manage your users. Let’s get started!
An Introduction to WordPress User Roles and Permissions (And Why They’re Important)
WordPress user roles and permissions are two different but interdependent concepts. User roles determine what a user can and can’t do on your WordPress site, based on their user type. These limitations are generalized for anyone who carries a certain user role status.
Permissions, on the other hand, are more individualized. You can create custom permissions for specific users, and control exactly what they are allowed to do on your site. Moreover, you can give different users distinct permissions depending on their role.
With this double-layered system, you can ensure that each user only sees and accesses the features that are appropriate for them. Furthermore, you can create custom roles with unique capabilities, which is a great way to provide additional functionality for advanced users or clients who need certain abilities not available in the default roles.
Both user roles and permissions are set by the Administrator, which is typically the WordPress site owner. By default, there are six different user roles: Super Admin, Administrator, Editor, Author, Contributor, and Subscriber. Each role has its own set of capabilities, which we’ll discuss in more detail below.
User roles and permissions play an important role in ensuring that your WordPress website is secure and runs smoothly. By managing these settings, you can control who has access to what areas of your site, and what they can do there.
If someone has too many privileges, they can end up publishing low-quality content or changing settings that impact the functionality or appearance of your site. The good news is that when you implement user roles and capabilities, you can have peace of mind knowing that only trusted parties have full admin access.
An Overview of the Default User Roles in WordPress
Now that you know a bit about the importance of user roles, let’s take a closer look at the six default user roles you can choose from when managing your WordPress website. Keep in mind that as an Administrator, you have the ability to create new user roles and assign them to specific users on your site. You can also manage permissions for existing user roles.
Super Admin
The Super Admin is the highest level of user on a WordPress site. This user has complete control over the site, including the ability to add and delete users, install and activate plugins, manage themes, and more. Super Admins are typically only found on multisite installations of WordPress.
Super Admins can manage every setting and feature for each site within a multi-site network. They can add and delete other Administrators, create new sites, and control content across each site.
Administrator
Administrators have complete control over a single WordPress site. They can add and delete users, install and activate plugins, manage themes, etc. Usually, they are the site owners or main authors:
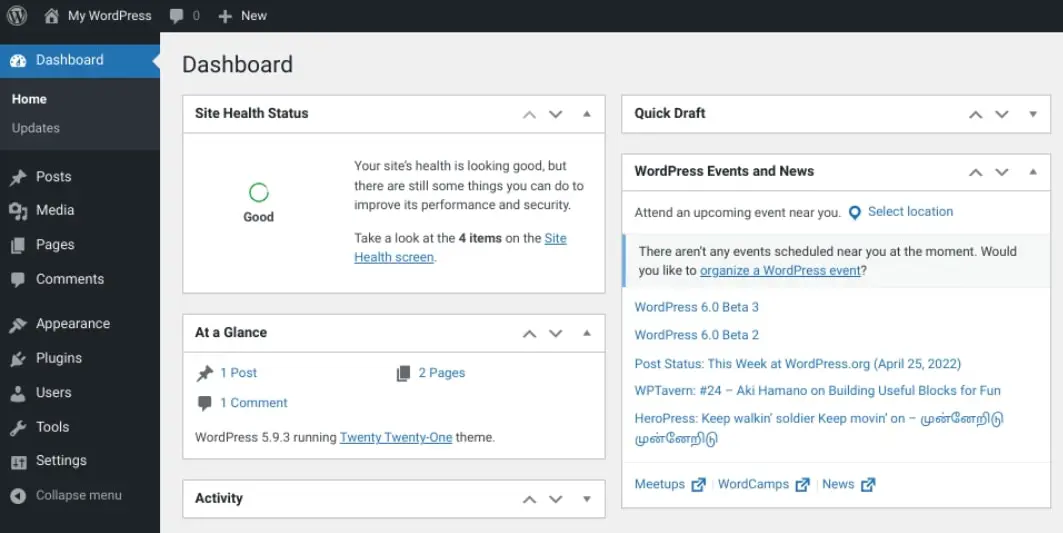
This powerful role has complete access to content, features, and site settings. They can update the CMS as well as plugins and themes. The Admin is also responsible for assigning user roles and capabilities to other registered users. Ideally, you should only have one Administrator per website.
Editor
Editors can manage and publish posts and pages, as well as moderate comments. They can also schedule content and edit categories. However, they cannot install or activate plugins, or manage themes:
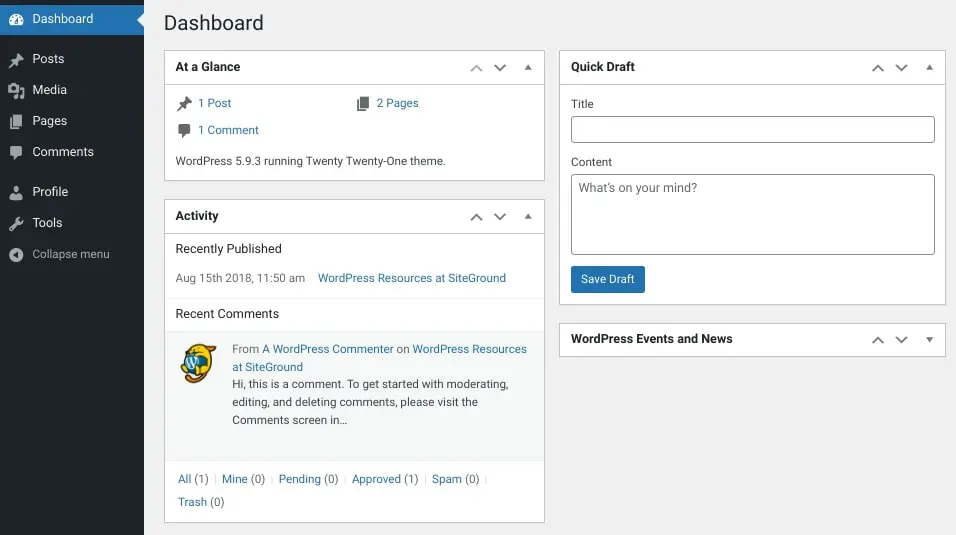
In a nutshell, an editor can modify content created by themselves and other users with a lower status, such as Authors and Contributors. They can’t change content for users with permissions higher than theirs, such as an Administrator. Typically, this role is reserved for content managers or similar titles.
Author
As you may have guessed, authors can write and publish their own posts and pages. They can also delete their own posts. However, they cannot publish, edit, or delete anyone else’s posts. Additionally, authors cannot add or delete users, install or activate plugins, or manage themes:
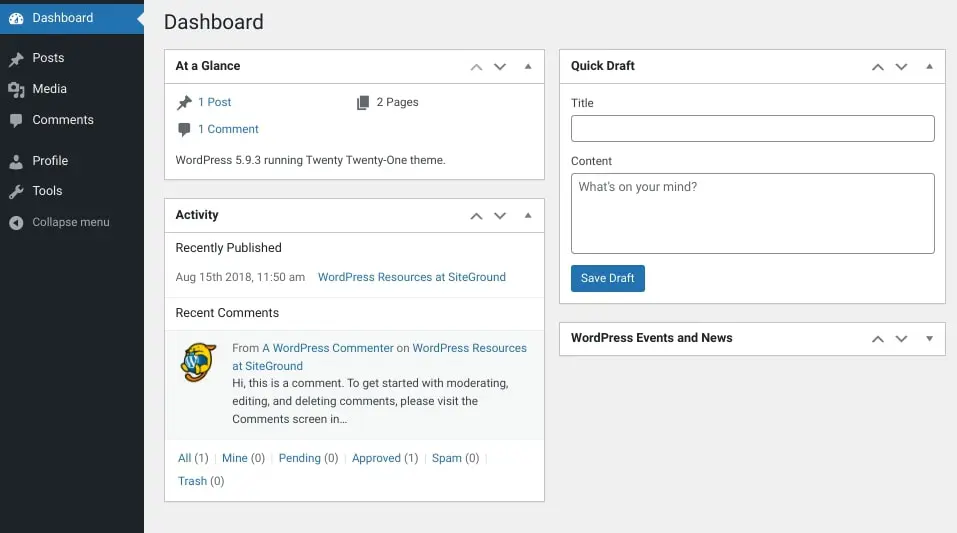
Unlike Contributors, Authors have access to the WordPress Media Library. While they can edit reader comments, they can only do so on their own posts.
Contributor
WordPress Contributors can write and submit their own posts for review by an Administrator or Editor. Once a post is published, they cannot edit it. Furthermore, contributors cannot add or delete users, install or activate plugins, or manage themes.
Contributors are usually roles assigned to freelance writers or guest bloggers. This role is also commonly used for new hires whose content needs editing or reviewing before it can be published on the site.
Once submitted for review, only the Editor or Administrator can publish their posts. Contributors cannot access the Media Library.
Subscriber
Subscribers can manage their own profiles and read posts and pages on a WordPress site. They cannot write or publish their own posts or pages, nor can they add or delete users, install or activate plugins, or manage themes:
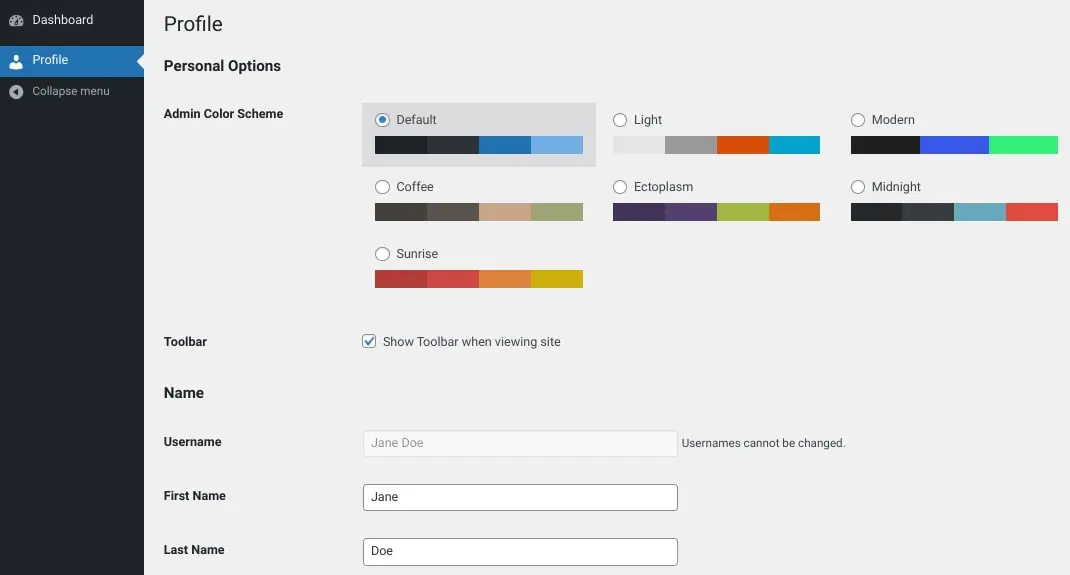
Subscribers have the fewest permissions and capabilities of all the WordPress roles. It is the default user role set for new registrations.
There are a few additional user role options available on some WordPress sites. For example, if you’re running a WooCommerce site, Shop Managers have similar capabilities to Administrators, but with some added features specifically for managing WooCommerce stores. For instance, they can add and delete products, manage orders, and more.
How to Manage User Roles in WordPress
Now that you have a better sense of what each user role can do, let’s get into how to manage them. Below, you’ll find instructions for how to add, delete, and update users and user roles in WordPress.
1. Creating and Deleting Users in WordPress
Before you assign a user role in WordPress, you first need to have a user to attach it to. To add a new user in WordPress, you can navigate to Users > Add New, then fill in the information. This will include details such as username, email, and password:
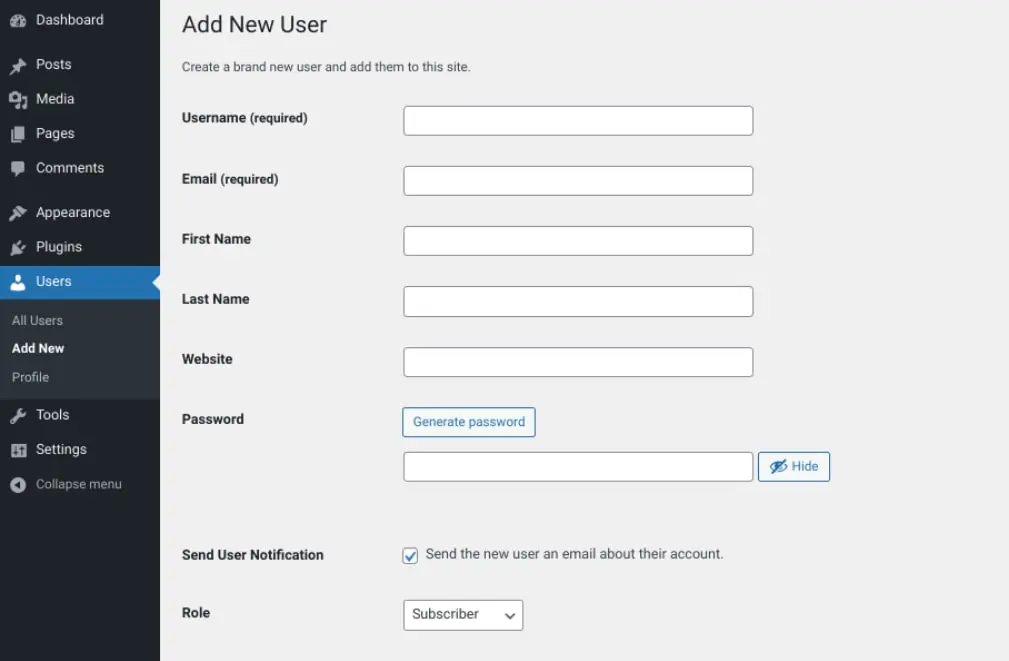
Note that, by default, the Role is automatically set to Subscriber. When you’re done, you can click on the Add New User button at the bottom of the screen.
Alternatively, you can create a new user through your database. To do this, you can navigate to phpMyAdmin from your cPanel dashboard (or whichever system your host uses), then select your WordPress database.
Next, locate the wp_users table (name may vary depending on your database prefix):
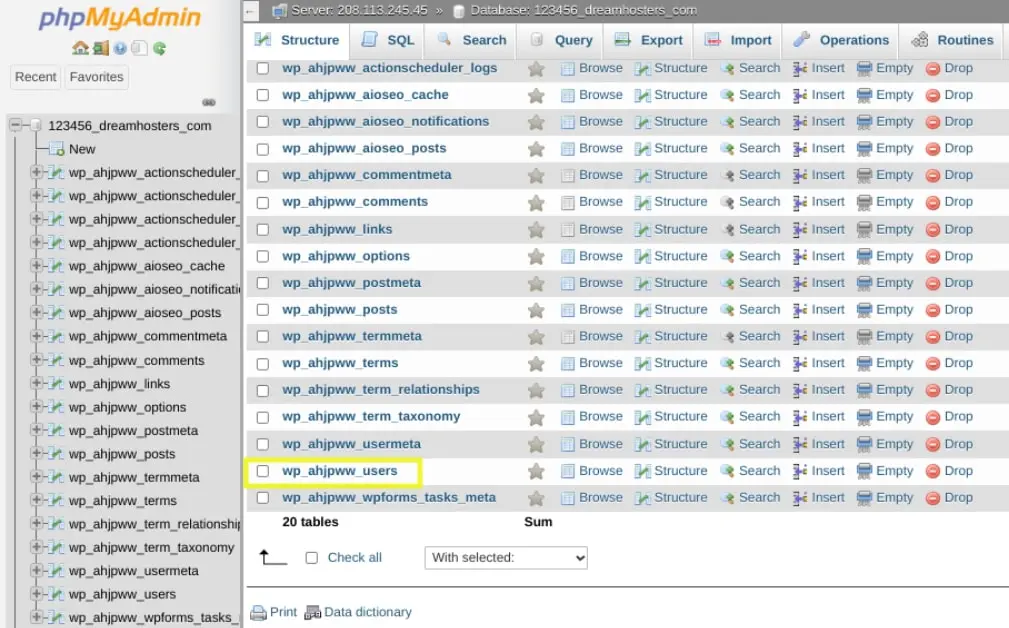
Once you click on the users table, you can select the Insert tab:
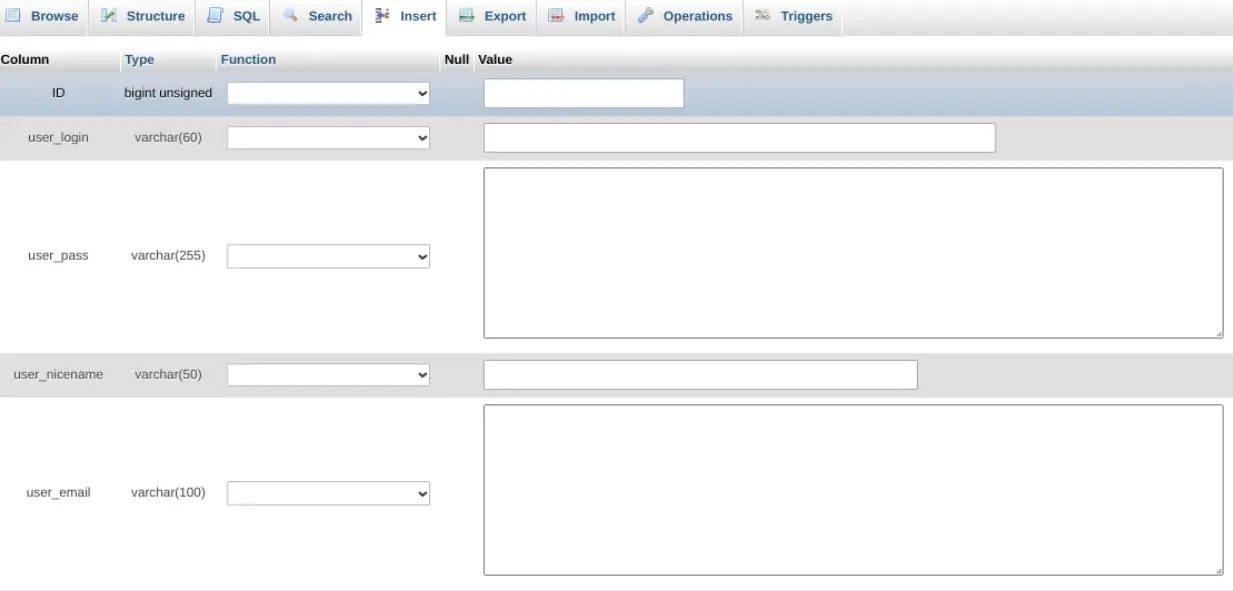
On this screen, you can enter the following credentials:
- user_login: The username you want to assign the user.
- user_pass: The password for the user’s account; you can select MD5 in the Function drop-down.
- user_email: The email address you want to use.
- user_registered: The date and time for when the user will be registered.
- user_status: You can set this value to “0”.
When you’re done filling out the details, you can click on the Go button at the bottom of the screen. Next, navigate back to your WordPress database, then select the wp_usermeta table, followed by the Insert tab:

You can insert the following details in the form:
- unmeta_id: This is autogenerated, so you can leave it blank.
- User_id: The id of the user you created.
- Meta_key: You can set this as “wp_capabilities”.
- meta_value: Add this as “a:1:{s:13:”administrator”;b:1;}”
Finally, you can add another row. Then, input the following information:
- Unmeta_id: You can leave this blank.
- User_id: The id of the user you created.
- Meta_key: You can make this “wp_user_level”.
- Meta_value: You can put this as “10”.
When you’re finished, you can click on the Go button to save your changes.
To find a full list of your users, you can go to Users > All Users from your admin interface:
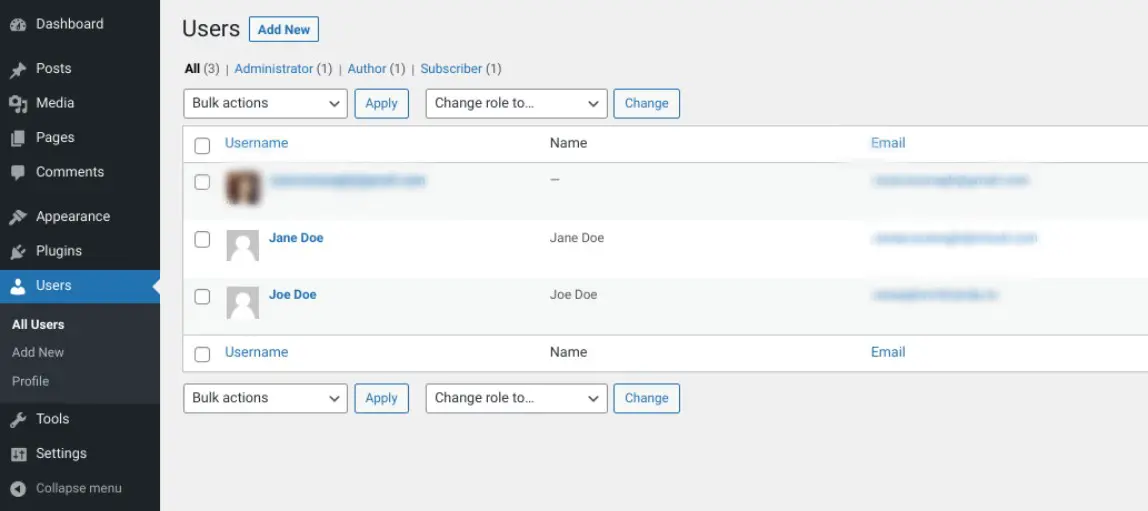
To delete a user from your WordPress dashboard, you can hover your mouse over the name of the user, then click on the Delete link. That’s it!
You can delete a user from your WordPress database as well. To do so, log into phpMyAdmin, then navigate to the wp_users table:

Next to each user, you’ll find an Edit, Copy, and Delete option. Simply select Delete to remove the user.
2. Adding a User Role
There are a few ways to create a new user role in WordPress. The easiest way is to go through the admin interface. As you may have noticed in the last section, you can assign a user role at the time of creating a new user.
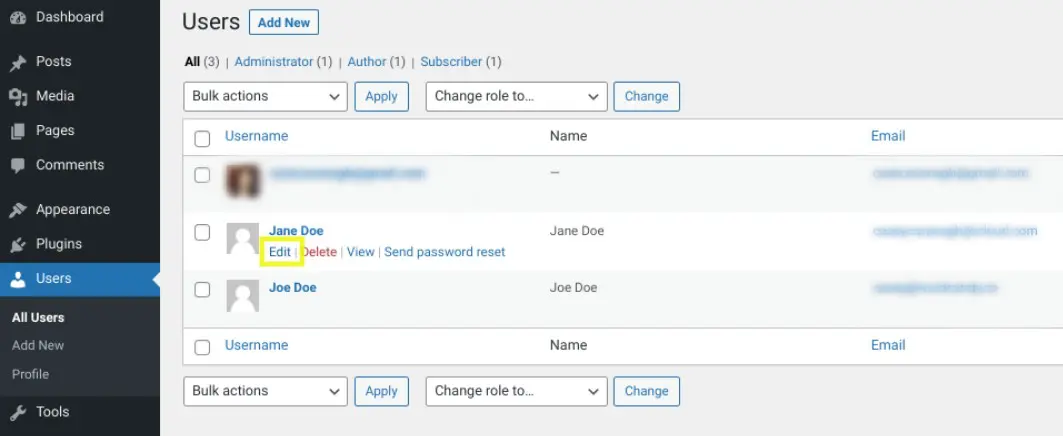
To assign or update a role to an existing user, you can navigate to User from your WordPress dashboard, then select the Edit link under the user name:
At the bottom of the screen, you can select an option from the Role drop-down menu:
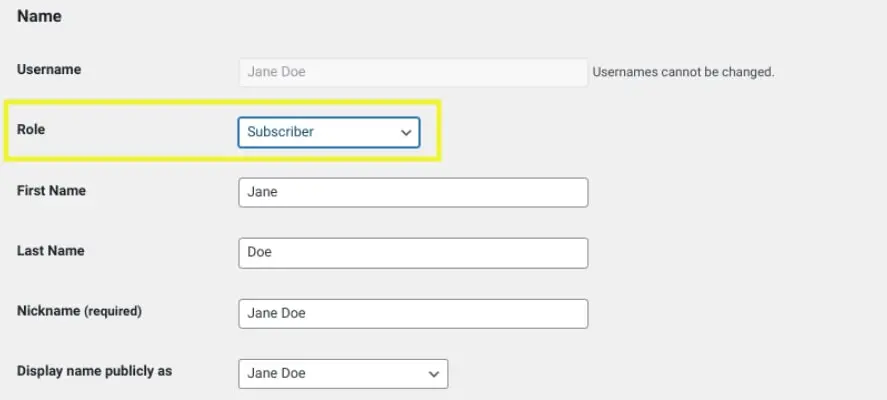
When you’re done, you can simply select the Add New User or Update User button at the bottom of the screen.
Another way you can add a new user role in WordPress is by manually editing your code. For instance, you can add a custom user role, such as Moderator, with the add_role() function.
To do so, you can add the following code to your theme’s functions.php file:
add_role( 'new_user_role', __( 'Moderator' ), array( 'read' => true, 'edit_posts' => true, 'delete_posts' => true ) );
When you’re done, be sure to update the file to save your changes. It’s as simple as that!
3. Deleting a User Role in WordPress
If you want to delete a user role in WordPress so that it is no longer an option, you can do so by editing your theme’s files. Keep in mind that modifying theme files can be risky, so it’s best to create a backup of your site before you continue on.
To get started, go to Appearance > Theme File Editor in your WordPress dashboard. Next, locate and open the Theme Functions file:
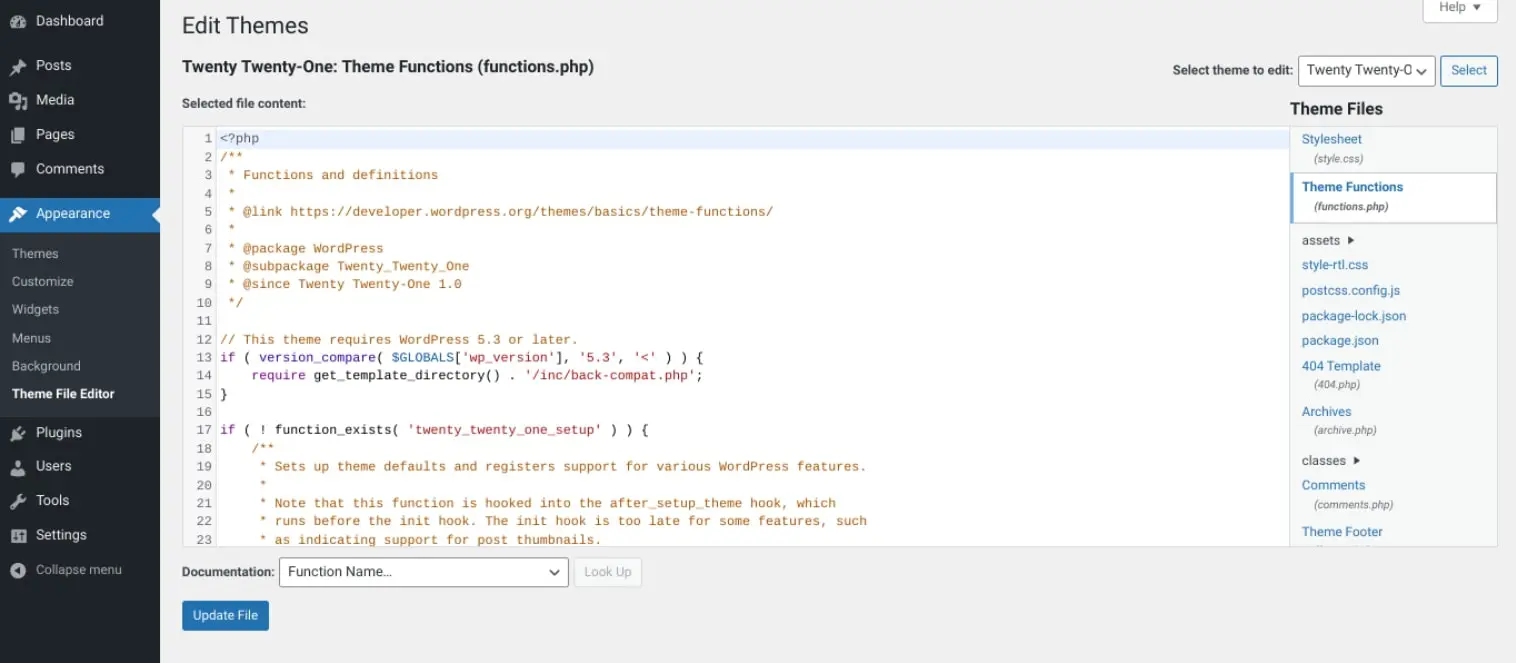
In this file, you can add one (or all) of the following code snippets, depending on which user role(s) you want to remove:
remove_role( 'subscriber' );
remove_role( 'editor' );
remove_role( 'contributor' );
remove_role( 'author' );
When you’re done, select the Update File to save your changes.
4. Updating Existing User Roles and Permissions
If you want to update an existing user’s permissions, you can select the Edit link from the User list. You can then scroll to the bottom of the screen and modify the role by selecting a new one from the User Role drop-down menu. Remember to save your changes.
Another option is to use a plugin, such as User Role Editor:

This free version of this tool lets you easily change user roles and capabilities. Once installed and activated on your site, you can browse to Users > User Role Editor:
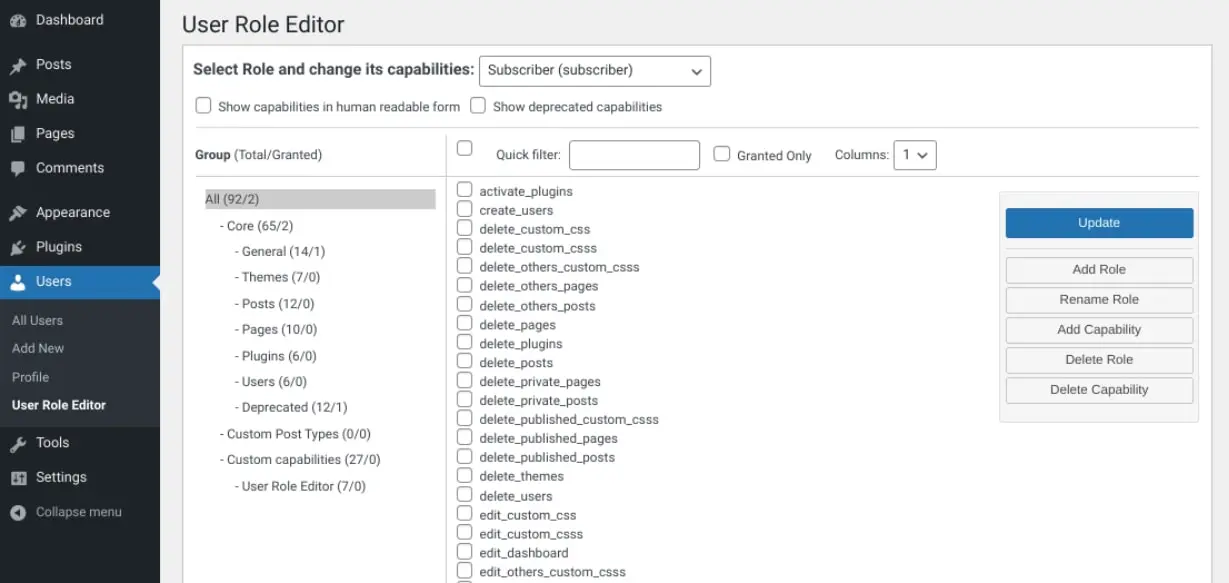
Next, you can select the checkboxes of the capabilities you want to allow the selected role to have. When you’re done, click on the Update button at the bottom of the screen to save your changes.
The plugin also lets you add new roles or delete ones that you aren’t using. It even lets you assign capabilities on a per-user basis.
Tips for Picking the Right User Roles and Permissions
As a general rule of thumb, it’s a smart idea to set the user role as low as possible. In other words, you want to give users as few permissions as possible that won’t interfere with or impact their ability to do their assigned tasks.
Selecting the roles for your users should be based on the level of access that’s necessary.There are also specific roles for certain use cases.
For example, if you have a full-time writer for your WordPress website, you can assign them the Author role. They’ll be able to write, draft, and publish posts on your site, as well as access the Media Library. However, they won’t be able to access, edit, or delete other pages and posts. Therefore, if this is a necessary capability, you may want to assign them the Editor role.
On the other hand, if you have a freelance writer or a new hire that you don’t want to give publishing privileges to, you can make them a Contributor. This will let them write pages and posts, but they won’t be able to publish them. They can only submit it to the Editor (or Admin) for review.
Consider assigning the Contributor role to anyone that doesn’t work in-house. We also recommend having as few Administrators as possible. This can help safeguard your site and prevent errors.
If you have a multi-site installation, it’s a good idea to have one Super Admin. That way, they can handle any security or site issues that arise on any of the sites without interference or confusion from other admins. However, you could assign a single Administrator or Editor for each of the sites within your multisite network.
Troubleshooting WordPress User Role and Permission Issues
WordPress user roles and permissions are relatively straightforward and easy to use. However, sometimes issues arise, which can make it difficult for users with certain roles or permissions to carry out their tasks properly.
One of the most common is being locked out of your WordPress admin and encountering a page with the message “Sorry, you are not allowed to access this page”. This error can be frustrating because it can be challenging to nail down the cause of it.
However, if you see this message it’s likely because there’s a permission setting that is preventing you from accessing a certain area for security purposes. If you’re an Administrator or should have access, there are a few potential solutions you can try out.
If this issue occurred directly after a WordPress update, restore the previous version of your site. Next, you can try disabling all of your plugins and re-enabling them one-by-one. You can also try activating a default WordPress theme. These steps can help you narrow down the source of the notification.
Alternatively, you can check to ensure that you have the necessary Administrator privileges. To do this, navigate to phpMyAdmin then to the wp_users table.
Next, locate your username and make a note of your ID. Browse to the wp_usermeta table and locate your metauser ID:

Under the Metavalue column, it should read as the following:
A:1:{s:13:"administrator";s:1:"1";} If there is something else in this field, we recommend editing it to replace it with the above. Simply save your changes when you’re done.
Useful WordPress User Role and Permissions Plugins
At this point, you likely understand the various settings and options you have for changing user roles and permissions in WordPress. However, to make the process even easier, you might consider using a plugin.
We already discussed the User Role Editor plugin, but there are a handful of additional options to choose from. Below, we’ll take a look at some of the most popular ones and explain what you can use them for.
Members
Members is a plugin that lets you manage the permissions of registered users:

It’s beginner-friendly, boasting an intuitive interface that is easy to navigate. You can use it to create new roles and add permissions to each one. You can also clone user roles and customize the permissions for blog content.
PublishPress Capabilities
PublishPress Capabilities is another useful tool that can help you gain more control over your user roles:

It lets you add new roles, clone existing ones, and add individual permissions for each role. You can also backup, migrate, and restore the permissions. It can be used for single websites or on multisite networks. The plugin also integrates seamlessly with WooCommerce, which is helpful for store and product management.
WPFront User Role Editor
WPFront User Role Editor is a popular plugin you can use for managing user roles in WordPress:

You can use it to create, delete, and modify user permissions. You can add new names for roles and clone existing ones. It also lets you assign multiple roles to users.
Take Control of User Role Management on Your WordPress Site
If you’re looking to manage WordPress user roles and permissions, it’s important to understand the different capabilities associated with each role. With this information, you can better manage your site and ensure that users have the appropriate level of access to your content and features.
Whether you’re managing a simple blog or creating a complex website with multiple authors, user permissions are an important part of WordPress. With the right set of permissions in place, you can ensure that your site remains secure and runs smoothly.
Are you interested in learning about more ways you can make managing your WordPress site as simple as possible? Check out our Managed WordPress Hosting solutions to learn about DreamPress!

Do More with DreamPress
DreamPress’ automatic updates, caching, and strong security defenses take server management off your hands so you can focus on content creation.
Check Out Plans
